ArchLinuxにメールサーバー構築 [postfix,dovecot]
投稿日: 最終更新日:
さくらのメールボックスから移行します。ローカル隔離、バーチャルドメイン・ユーザー、一部別メールボックス構成、LMTPでかなりゴテゴテしたサーバーを構築します。設定のキモさでは世界一かもしれません。
はじめに
自宅で結構長期間運用していた RedHat Enterprise Linux 9 サーバーが死に、 ArchLinux の強めのマシンに変わったため、メールサーバーをローカルに新規構築する計画を立てました。
というのも現在、特に理由なく自分が持っているドメインでメールを運用しています。
一年で数百円程度の費用でさくらのメールボックスを使っていました。
費用的にも最強だと思っていますが、メールのみ外部に依存しているのは、メールだけ諦めたみたいな感じで嫌だったので、別に新しくメールサーバーを建てることにしました。
一つ先に忠告しておくと、かなりキモい設定を入れ込みました。インフラ屋なので、簡単な postfix サーバーの立ち上げだと味気なくて記事を書くモチベが上がらなかったので、バーチャルドメインしつつ一部のドメインはメールボックスを分けてあります。
正直保守性的にもあり得ない構成なのですが、こういうのができるのこそ自宅サーバーなので、あまり参考にされると地獄というか虚無になる可能性があります。
また、新年早々にセキュリティ的によろしくないことが起こったため、丸見えだったドメインを隠しました。 domain.tldが自分の本番ドメインを思っていただけたらと思います。
構築するサーバーについて
自宅で運用しているサーバーがあり、そいつの中に構築していきます。
マイクラ鯖運用もしている Intel の中古ゲーミングワークステーションの薄い版みたいなやつですね。Nuro の Onu 兼ルーターの直下から繋げてるので、回線だけ爆速です。
友人がマイクラサーバーを構築して公開したいってことだったので、そいつが多めに金払ってメルカリでいい型落ちゲーミングを狙ってこっちに発送されてきました。
そいつと話し合った結果、インストールする OS は ArchLinux ということになりました。パッケージマネージャ(AUR ヘルパー)は paru を使ってます。
タイミングもいいので、ArchLinux にメールサーバーを構築していきます。Linux で建てるのとは、postfix,dovecot のインストールくらいまでは違う手順になりますが、ほぼ一緒だと思います。
また、一つ面倒なのが、ほとんどの家がそうだと思いますが、自宅回線なので、IP が動的というのと、OP25B の影響を受けます。 IP が動的というのは、Cloudflare API でサーバーのデーモンがうまいこと設定してくれます。しかし、OP25B は結構厄介です。 Outbound Port 25 Blocking の略ですが、読んで字の如く 25 ポートから出ていくトラフィックを ISP がブロックします。 だるいですが、実際ないと多分迷惑メールがやばいことになるので許します。まあ迷惑メールがなくなったわけじゃないんで、悪影響しか受けない自分は普通に最悪の気分です。今の時代騙される奴なんて中々いないだろうに。
OP25B 回避策
OP25B 対策として、メール送信サービスを利用します。具体的には SendGrid を使います。postfix からリレー先として指定するだけだと思うので、本当に神です。 メールサーバーをローカル立ててるのにどういうこととは思いますが、確実に自宅の可用性よりクラウドのあっちの方が高いと思ってのことです笑
正直にいうと、OP25B の回避策がそれしかないためです。 Nuroの契約時届いたメールサーバー設定のハガキを画像で保持していました。 しかし、いざ使おうとしたところアカウントが削除されてました。 使用していないアカウントは 2024 年の最初あたりで消されてたらしいです。 普通にゴミです。
メールボックス設定のキモい設定について
冒頭でも触れましたがユーザー・メールボックス周りがかなり気色悪い設定になっています。 以下にやったことをまとめますが、作業ベースなので漏れがあるかもしれません。その時は連絡ください。直します。
現在運用中のさくらのメールボックスは、mydestination に複数ドメインを指定してあるだけみたいな環境です。例えば、[email protected],[email protected]が宛先のメールは同じ mail のメールボックスに配送される、といった形です。
そして、ユーザーはコンパネから作成する必要があります。
mail ユーザー以外もユーザーがあり、それら全てを Linux ユーザーとして作成するのは面倒だし /home が汚れて普通に嫌です
これらとは別に、その ArchLinux を共同で管理している友人と所有しているドメインがあり、そのメールも捌きたいです。 しかし、それらのメールが個人使用のドメインと同じメールボックスに配送されるのはかなり渋いです。したがって、domain.tld と自分の個人的なドメインは別メールボックスで管理します。
具体的に何をするのかというと、dovecot2.X で使用可能な LMTP サーバー機能を利用します。
全てのメールボックス設定値をテキスト形式の設定ファイルで完全に管理する形をとります。
というのも、配送先含めて dovecot のユーザー管理のみでそれら全てを定義できるようになるので、一部のドメインはメールボックスを共通にし、一部のドメインは別メールボックスになるようにユーザー定義を自分で行うことでそれらを実現します。
かなり面倒ではありますが、テキストで管理するのは Linux のシステムユーザーを使った変な管理より安定していると感じるので、とりあえずその方向で頑張ってみます。
NixFlake リスペクトです。まあ LMTP を使うので dovecot の設定をうまく管理できるように頑張るだけです。
- バーチャルユーザーを使用
- バーチャルドメインで複数のドメインを同一のメールボックスで管理
- 一部ドメインは別メールボックスで管理
以上の設定を一つの dovecot 内で共存させます。
しかし、システムメールなどは飛ばしたいため、ローカル配送はpostfixにやらせます。そのためpostfixもフルでセットアップします。 システムメールは、メインのドメインからmail.のサブドメインを切り、それをローカル配送のドメインにしようと思います。 そのドメインの場合はpostfixでローカル配送させるようにします。
メールサーバー設定まとめ
主なプログラム
- postfix
- dovecot
- SendGrid
今回のサーバーについては、セキュリティ的に弱いポートなどは基本的に外出ししない方針で行きます。 受信のために 25 ポートを開ける必要はありますが。
また、POP3 は使用しません。
25 : smtp
587 : submission(starttls)
993 : imap(ssl/tls)
証明書は LetsEncrypt のものを使用。
SASL 認証サーバーは、Dovecot を使用します。
送受信の認証を一本化できるからです。そのため Cyrus SASL は使用しません。
自宅のサーバーが落ちた場合、メールが配達不可になってしまうため、念の為フェイルオーバーとして、さくらのメールボックスは契約し続けます。(?)
ローカル配送のシステムメールは潰したくないので、myhostnameをローカル配送のドメインとして使用しそれはDovecotLMTPではなくpostfixにシステムユーザーへ配送させます。
ローカルメールは基本的にcronなどの配送先として使いたいだけなので、外部からの接続は不可能にしています。
メールサーバーの具体的な設定値は以下のとおりです。コマンドを参照する際に参考になれば。
バーチャルユーザーのメール保存場所 : /var/vmail/${DOMAIN}/${USERNAME}/mail ※1
バーチャルユーザーのメール保存形式 : Maildir
バーチャルユーザーのパスワード保存形式 : bcrypt ※2
システムユーザーのメール保存場所 : ~/mail ※3
※1 dovecotドキュメント によると、仮想ユーザー使用時の推奨らしいです。
※2 システムのcrypt(1)を利用する設定にすることでハッシュアルゴリズムは自動的にこれになります。SHA512-CRYPTより強いです。
※3 バーチャルユーザーのものと揃えたかったためもあり一般的な~/Maildirとは設定を変化させました。特に問題はない認識です。
フェーズ1
作業フェーズ1では、postfix,dovecot,SendGrid周りと、仮想ユーザーがうまく動作することを確認するとこまで行います。
1. プログラム類インストール
postfix,dovecot をインストールします。
[buntin@badcompany ~]$ paru -S postfix dovecot
resolving dependencies...
looking for conflicting packages...
warning: dependency cycle detected:
warning: postfix-lmdb will be installed before its postfix dependency

Packages (6) liburing-2.8-1  mariadb-libs-11.6.2-2  postfix-lmdb-3.9.0-4  postgresql-libs-16.3-4  dovecot-2.3.21.1-1  postfix-3.9.0-4

Total Download Size:   12.06 MiB
Total Installed Size:  47.35 MiB

:: Proceed with installation? [Y/n]
:: Retrieving packages...
 mariadb-libs-11.6.2-2-x86_64                                                                                   5.4 MiB  17.2 MiB/s 00:00 [####################################################################################] 100%
 dovecot-2.3.21.1-1-x86_64                                                                                      3.5 MiB  57.8 MiB/s 00:00 [####################################################################################] 100%
 postgresql-libs-16.3-4-x86_64                                                                               1673.7 KiB  40.9 MiB/s 00:00 [####################################################################################] 100%
 postfix-3.9.0-4-x86_64                                                                                      1371.4 KiB  33.5 MiB/s 00:00 [####################################################################################] 100%
 liburing-2.8-1-x86_64                                                                                        189.4 KiB  6.85 MiB/s 00:00 [####################################################################################] 100%
 postfix-lmdb-3.9.0-4-x86_64                                                                                   21.6 KiB   830 KiB/s 00:00 [####################################################################################] 100%
 Total (6/6)                                                                                                   12.1 MiB  18.0 MiB/s 00:01 [####################################################################################] 100%
(6/6) checking keys in keyring                                                                                                            [####################################################################################] 100%
(6/6) checking package integrity                                                                                                          [####################################################################################] 100%
(6/6) loading package files                                                                                                               [####################################################################################] 100%
(6/6) checking for file conflicts                                                                                                         [####################################################################################] 100%
(6/6) checking available disk space                                                                                                       [####################################################################################] 100%
:: Processing package changes...
(1/6) installing postfix-lmdb                                                                                                             [####################################################################################] 100%
(2/6) installing postfix                                                                                                                  [####################################################################################] 100%
Optional dependencies for postfix
    perl: for postfix-collate.pl, postfix-tlstype.pl and qshape [installed]
    postfix-cdb: for CDB integration
    postfix-ldap: for LDAP integration
    postfix-lmdb: for LMDB integration [installed]
    postfix-mongodb: for MongoDB integration
    postfix-mysql: for MySQL integration
    postfix-pcre: for PCRE integration
    postfix-pgsql: for PostgreSQL integration
    postfix-sqlite: for SQLite integration
(3/6) installing liburing                                                                                                                 [####################################################################################] 100%
(4/6) installing mariadb-libs                                                                                                             [####################################################################################] 100%
Optional dependencies for mariadb-libs
    krb5: for gssapi authentication [installed]
(5/6) installing postgresql-libs                                                                                                          [####################################################################################] 100%
(6/6) installing dovecot                                                                                                                  [####################################################################################] 100%
Optional dependencies for dovecot
    libldap: ldap plugin [installed]
    lua53: LUA auth and push support
    clucene: alternative FTS indexer
:: Running post-transaction hooks...
(1/4) Creating system user accounts...
Creating group 'postdrop' with GID 75.
Creating group 'dovenull' with GID 74.
Creating user 'dovenull' (Dovecot user for completely untrustworthy processes) with UID 74 and GID 74.
Creating group 'dovecot' with GID 76.
Creating user 'dovecot' (Dovecot user) with UID 76 and GID 76.
Creating group 'postfix' with GID 73.
Creating user 'postfix' (n/a) with UID 73 and GID 73.
(2/4) Reloading system manager configuration...
(3/4) Creating temporary files...
(4/4) Arming ConditionNeedsUpdate...
2. dovecot の設定
LMTP を使用する関係上、dovecot から設定しました。どちらが先でも良いかと思います。 Dovecotの役割としては、IMAPサーバー、LMTPサーバーとしてのバーチャルユーザーへのメール配送、SASL認証サーバーとしてpostfixのバーチャルユーザー認証を担当します。
2.1 /etc/dovecot の確認 & pop3の無効化
ArchLinux なので、 /etc/dovecot が自動生成されません。
テンプレからコピーします。
root@badcompany /etc/dovecot                                                        [0:31:20]
> # cp /usr/share/doc/dovecot/example-config/dovecot.conf /etc/dovecot
root@badcompany /etc/dovecot                                                        [0:31:32]
> # cp -r /usr/share/doc/dovecot/example-config/conf.d /etc/dovecot
root@badcompany /etc/dovecot                                                        [0:31:38]
> # ls -l
total 12
drwxr-xr-x 2 root root 4096 Dec  6 00:31 conf.d
-rw-r--r-- 1 root root 4333 Dec  6 00:31 dovecot.conf
root@badcompany /etc/dovecot                                                        [0:47:45]
> # ls -l conf.d
total 128
-rw-r--r-- 1 root root  5248 Dec  6 00:31 10-auth.conf
-rw-r--r-- 1 root root  1781 Dec  6 00:31 10-director.conf
-rw-r--r-- 1 root root  3757 Dec  6 00:31 10-logging.conf
-rw-r--r-- 1 root root 17770 Dec  6 00:31 10-mail.conf
-rw-r--r-- 1 root root  3619 Dec  6 00:31 10-master.conf
-rw-r--r-- 1 root root  1585 Dec  6 00:31 10-metrics.conf
-rw-r--r-- 1 root root  3433 Dec  6 00:31 10-ssl.conf
-rw-r--r-- 1 root root  1657 Dec  6 00:31 15-lda.conf
-rw-r--r-- 1 root root  3111 Dec  6 00:31 15-mailboxes.conf
-rw-r--r-- 1 root root  4520 Dec  6 00:31 20-imap.conf
-rw-r--r-- 1 root root  1367 Dec  6 00:31 20-lmtp.conf
-rw-r--r-- 1 root root  4066 Dec  6 00:31 20-pop3.conf
-rw-r--r-- 1 root root  4299 Dec  6 00:31 20-submission.conf
-rw-r--r-- 1 root root   676 Dec  6 00:31 90-acl.conf
-rw-r--r-- 1 root root   292 Dec  6 00:31 90-plugin.conf
-rw-r--r-- 1 root root  2596 Dec  6 00:31 90-quota.conf
-rw-r--r-- 1 root root   499 Dec  6 00:31 auth-checkpassword.conf.ext
-rw-r--r-- 1 root root   489 Dec  6 00:31 auth-deny.conf.ext
-rw-r--r-- 1 root root   343 Dec  6 00:31 auth-dict.conf.ext
-rw-r--r-- 1 root root   924 Dec  6 00:31 auth-ldap.conf.ext
-rw-r--r-- 1 root root   561 Dec  6 00:31 auth-master.conf.ext
-rw-r--r-- 1 root root   515 Dec  6 00:31 auth-passwdfile.conf.ext
-rw-r--r-- 1 root root   788 Dec  6 00:31 auth-sql.conf.ext
-rw-r--r-- 1 root root   611 Dec  6 00:31 auth-static.conf.ext
-rw-r--r-- 1 root root  2182 Dec  6 00:31 auth-system.conf.ext
root@badcompany /etc/dovecot                                                        [0:47:45]
> # cp -p dovecot.conf{,.$(date "+%Y%m%d")}
root@badcompany /etc/dovecot                                                        [2:29:42]
> # diff dovecot.conf.20241207 dovecot.conf
24a25
> protocols = imap lmtpdovecot.confのprotocolsの設定をコメントアウトをはずし、pop3,submissionを消しています。
2.2 仮想ユーザー使用の設定
conf.d で、ファイルによるバーチャルユーザー管理を有効にします。
root と buntin ユーザーでプロンプトが違うのは共用アカウントのためです。
root@badcompany /etc/dovecot/conf.d                                                 [1:15:22]
> # cp -p 10-auth.conf{,.$(date "+%Y%m%d")}
root@badcompany /etc/dovecot/conf.d                                                 [1:17:06]
> # vim 10-auth.conf
root@badcompany /etc/dovecot/conf.d                                                 [1:25:05]
> # diff 10-auth.conf.20241206 10-auth.conf
10c10
< #disable_plaintext_auth = yes
---
> disable_plaintext_auth = yes
100c100
< auth_mechanisms = plain
---
> auth_mechanisms = plain login
122c122
< !include auth-system.conf.ext
---
> #!include auth-system.conf.ext
125c125
< #!include auth-passwdfile.conf.ext
---
> !include auth-passwdfile.conf.ext
ここまでで、pam認証(システムユーザーを使った認証)の無効化とパスワードファイルを使用した仮想ユーザー認証の有効化を行っています。
root@badcompany /etc/dovecot/conf.d                                                                                                                                           [9:10:35]
> # cp -p auth-passwdfile.conf.ext{,.$(date "+%Y%m%d")}
root@badcompany /etc/dovecot/conf.d                                                                                                                                           [9:10:45]
> # ll | grep auth-passwd
total 140K
-rw-r--r-- 1 root root  515 Dec  6 00:31 auth-passwdfile.conf.ext
-rw-r--r-- 1 root root  515 Dec  6 00:31 auth-passwdfile.conf.ext.20241206
2.3 dovecot の仮想ユーザー設定
LMTP を使用している以上、dovecot のユーザー設定が受信ユーザーの定義そのものになります。
auth-passwdfile.conf.ext にあるpassdb,userdbの設定を行います。
2.2の内容からも分かる通り、passwd-fileを使用した仮想ユーザーを構成します。
root@badcompany /etc/dovecot/conf.d                                                [21:37:34]
> # vim auth-passwdfile.conf.ext
root@badcompany /etc/dovecot/conf.d                                                [21:43:02]
> # diff auth-passwdfile.conf.ext.20241206 auth-passwdfile.conf.ext
16a17
>   default_fields = uid=vmail gid=vmail
root@badcompany /etc/dovecot/conf.d                                                [21:44:03]
> # less auth-passwdfile.conf.ext
root@badcompany /etc/dovecot/conf.d                                                [21:46:13]
> # cat auth-passwdfile.conf.ext
# Authentication for passwd-file users. Included from 10-auth.conf.
#
# passwd-like file with specified location.
# <doc/wiki/AuthDatabase.PasswdFile.txt>

passdb {
  driver = passwd-file
  args = scheme=CRYPT username_format=%u /etc/dovecot/users
}

userdb {
  driver = passwd-file
  args = username_format=%u /etc/dovecot/users

  # Default fields that can be overridden by passwd-file
  #default_fields = quota_rule=*:storage=1G
  default_fields = uid=vmail gid=vmail

  # Override fields from passwd-file
  #override_fields = home=/home/virtual/%u
}vmailというユーザーを仮想ユーザーの使用ユーザーとして定義するデフォルト設定を入れただけです。
今回構築する構成では、Dovecotの全てのメールユーザーが仮想ユーザーとなりシステムユーザーは関わりません。
そのため、全ての仮想ユーザーのためのシステムユーザーを作成する必要があります。今回は vmail ユーザーを作成します。
root@badcompany /etc/dovecot                                                       [21:29:59]
> # groupadd -g 5000 vmail
root@badcompany /etc/dovecot                                                       [21:31:40]
> # useradd -u 5000 -g 5000 -s /sbin/nologin -d /var/vmail vmail
root@badcompany /etc/dovecot                                                       [21:32:05]
> # grep "vmail" /etc/passwd
vmail:x:5000:5000::/var/vmail:/sbin/nologin
10-mail.conf の設定を変更し、各ホームディレクトリのmailディレクトリをメール保存ディレクトリとして使うように設定を変更。
root@badcompany /etc/dovecot/conf.d                                                [21:58:52]
> # cp -p 10-mail.conf{,.$(date "+%Y%m%d")}
root@badcompany /etc/dovecot/conf.d                                                [21:59:11]
> # vim 10-mail.conf
root@badcompany /etc/dovecot/conf.d                                                [21:59:44]
> # diff 10-mail.conf.20241207 10-mail.conf
30c30
< #mail_location =
---
> mail_location = maildir:~/mail
2.4 LMTPサーバー設定
今回のメール構成のキモである、LMTPサーバー設定まわりです。LMTPとは、(Local Mail Transfer Protocol)の略です。 ローカルの配送のためのプロトコルですが、今回はdovecotに何もかも任せるようにしてpostfixでバーチャルユーザーの設定をほぼしなくても良いようにします。 というのも、仮想ユーザー・仮想ドメインの使用環境で、一部同じメールボックス、一部別メールボックスにしつつ、送信ユーザーの認証はまた別にpostfixに設定するなどは、ダルすぎたためです。
Dovecotをローカルの配送、認証の両方でpostfixから利用させることで、ユーザー管理を全てdovecotで行うことができます。
普通に神です。
プロトコルが有効かどうか確認
root@badcompany /etc/dovecot/conf.d                                                 [2:41:53]
> # doveconf -a | egrep "^protocols"
protocols = imap lmtp
LMTPサーバーの有効化
root@badcompany /etc/dovecot/conf.d                                                [22:42:24]                                              [22:43:04]
> # cp -p 10-master.conf{,.$(date "+%Y%m%d")}
root@badcompany /etc/dovecot/conf.d                                                [22:43:10]
> # vim 10-master.conf
root@badcompany /etc/dovecot/conf.d                                                [23:55:40]
> # diff 10-master.conf.20241207 10-master.conf
61a62,69
>   user = vmail
>
>   unix_listener /var/spool/postfix/private/dovecot-lmtp {
>     group = postfix
>     mode = 0600
>     user = postfix
>   }
LMTPサーバーは基本的にroot権限を必要としますが、今回利用する環境ではvmail以上のユーザー権限は必要ありません。 このような場合LMTPサービス内の設定でvmailユーザーを指定し、よりアクセスが制限されている環境にすることでセキュアに運用できるようです。
また、LMTPサーバー接続用のUnixソケットはPostfixがアクセス可能な /var/spool/postfix/private 内に設置する必要があります。
2.5 Dovecot SASLの有効化
DovecotのSASL認証をpostfixから利用できるようにする設定を行います。
第一に、postfixがdovecotを使用した認証に対応しているか確認します。
> # postconf -a
cyrus
dovecot先ほど編集した10-master.conf のauthサービスの部分でそれっぽいところのコメントアウトを外します。
root@badcompany /etc/dovecot/conf.d                                                [3:36:57]
> # vim 10-master.conf
root@badcompany /etc/dovecot/conf.d                                                [3:37:41]
> # diff 10-master.conf.20241207 10-master.conf
61a62,69
>   user = vmail
>
>   unix_listener /var/spool/postfix/private/dovecot-lmtp {
>     group = postfix
>     mode = 0600
>     user = postfix
>   }
>
109,112c117,120
<   # Postfix smtp-auth
<   #unix_listener /var/spool/postfix/private/auth {
<   #  mode = 0666
<   #}
---
>   #Postfix smtp-auth
>   unix_listener /var/spool/postfix/private/auth {
>    mode = 0666
>   }
2.6 dovecotのユーザーを作成
フェーズ1では、テストのために1ユーザーのみ作成します。
root@badcompany /etc/dovecot                                [22:46:33]
> # doveadm pw -s CRYPT -p 'testpass'
{CRYPT}$2y$05$IjkNQZ7PuJaku9qDTrPvveRqqNy5mnFGq9Tvz1YwpQf/DMPyR/s/6
root@badcompany /etc/dovecot                                [22:47:41]
> # vim users
root@badcompany /etc/dovecot                                [22:48:52]
> # cat users
[email protected]:{CRYPT}$2y$05$IjkNQZ7PuJaku9qDTrPvveRqqNy5mnFGq9Tvz1YwpQf/DMPyR/s/6::::/var/vmail/domain.tld/mail::
vmail:vmailで先ほど作成したユーザーのホームディレクトリを作成しておきます
root@badcompany /etc/dovecot                                [22:50:27]
> # cd /var/
root@badcompany /var                                        [22:50:34]
> # ls -l
total 48
drwxr-xr-x  8 root root  4096 Oct  1 12:31 cache
drwxr-xr-x  3 root root  4096 Sep  8 19:13 db
drwxr-xr-x  2 root root  4096 Apr  8  2024 empty
drwxrwxr-x  2 root games 4096 Apr  8  2024 games
drwxr-xr-x 23 root root  4096 Dec  6 00:06 lib
drwxr-xr-x  2 root root  4096 Apr  8  2024 local
lrwxrwxrwx  1 root root    11 Nov 21 17:56 lock -> ../run/lock
drwxr-xr-x  9 root root  4096 Sep 15 16:32 log
lrwxrwxrwx  1 root root    10 Nov 21 17:56 mail -> spool/mail
drwxrwx---  2 root named 4096 Dec 12 11:24 named
drwxr-xr-x  2 root root  4096 Apr  8  2024 opt
lrwxrwxrwx  1 root root     6 Nov 21 17:56 run -> ../run
drwxr-xr-x  5 root root  4096 Dec  6 00:06 spool
drwxrwxrwt  7 root root  4096 Dec 14 06:39 tmp
drwxr-xr-x  3 root root  4096 Dec 14 22:50 vmail
root@badcompany /var                                        [22:50:38]
> # chown -R vmail: vmail
root@badcompany /var                                        [22:51:23]
> # ll
total 48K
drwxr-xr-x  8 root  root  4.0K Oct  1 12:31 cache
drwxr-xr-x  3 root  root  4.0K Sep  8 19:13 db
drwxr-xr-x  2 root  root  4.0K Apr  8  2024 empty
drwxrwxr-x  2 root  games 4.0K Apr  8  2024 games
drwxr-xr-x 23 root  root  4.0K Dec  6 00:06 lib
drwxr-xr-x  2 root  root  4.0K Apr  8  2024 local
lrwxrwxrwx  1 root  root    11 Nov 21 17:56 lock -> ../run/lock
drwxr-xr-x  9 root  root  4.0K Sep 15 16:32 log
lrwxrwxrwx  1 root  root    10 Nov 21 17:56 mail -> spool/mail
drwxrwx---  2 root  named 4.0K Dec 12 11:24 named
drwxr-xr-x  2 root  root  4.0K Apr  8  2024 opt
lrwxrwxrwx  1 root  root     6 Nov 21 17:56 run -> ../run
drwxr-xr-x  5 root  root  4.0K Dec  6 00:06 spool
drwxrwxrwt  7 root  root  4.0K Dec 14 06:39 tmp
drwxr-xr-x  3 vmail vmail 4.0K Dec 14 22:50 vmail
2.7 証明書の設定
ここでは、LetsEncryptで取得した証明書を利用します。
取得にdehydratedというクライアントを使用しているため、証明書の位置は変ですがただ証明書を指定しているだけです。
root@badcompany /etc/dovecot/conf.d                          [1:21:19]
> # cp -p 10-ssl.conf{,.$(date "+%Y%m%d")}
root@badcompany /etc/dovecot/conf.d                          [1:21:30]
> # vim 10-ssl.conf
root@badcompany /etc/dovecot/conf.d                          [1:22:21]
> # diff 10-ssl.conf.20241215 10-ssl.conf
6c6
< #ssl = yes
---
> ssl = required
12,13c12,13
< ssl_cert = </etc/ssl/certs/dovecot.pem
< ssl_key = </etc/ssl/private/dovecot.pem
---
> ssl_cert = </opt/dehydrated/certs/domain.tld/fullchain.pem
> ssl_key = </opt/dehydrated/certs/domain.tld/privkey.pem
3. postfixの設定
postfixの基本設定、追加でdovecotのLMTP周りの設定と、SendGrid周りの設定を行います。
postfixの今回の役割は、smtpサーバーとしてdovecotのLMTPの前段に構えることと、ローカル配送、SendGridにメールをリレーすることです。
また、smtp_sasl_password_maps = lmdb:/etc/postfix/sasl_passwd などの部分についてですが、ほとんどの記事などでは lmdb の部分が hash になっているかと思います。
ArchLinuxのpostfixでは、こちらのフォーラムにあるようにhashが使えなくなり、代わりにlmdbを使えとのことです。
ほとんどの人がレポジトリまで見に行かない中、そこのメッセージだけでそれを表現して伝わると思ってるところがキモいです普通に。SendGrid周りのデバッグでlmdb周りのwarningが出まくってたときは普通に殺意湧きました。
postmapの部分のlmdb:については、ArchLinux,AlpineLinuxの人以外はつけなくていいです。
その二つについているpostfixがbtree,hashのテーブルを受け付けなくなったため、上記のようにlmdb形式でマップにしなくてはならないためフォーマットを指定しています。
参考までに以下のようなエラーが出ます。warningですが、デーモンが死なないだけで通信は普通にできないです。
warning: unsupported dictionary type: hash. Is the postfix-hash package installed?
error: unsupported dictionary type: hash
warning: hash:/etc/aliases is unavailable. unsupported dictionary type: hash
warning: hash:/etc/aliases: lookup of 'myalias' failed
3.1 基本設定
master.cf の設定をします。25,587ポートで各種接続を受け取るようにします。
root@badcompany /etc/postfix                                                       [4:43:32]
> # diff master.cf.20241208 master.cf
12a13
>   -o smtpd_recipient_restrictions=reject_unverified_recipient,permit_mynetworks,reject_unauth_destination
53a55,59
> submission inet n       -       n       -       -       smtpd
>   -o syslog_name=postfix/submission
>   -o smtpd_sasl_auth_enable=yes
>   -o smtpd_recipient_restrictions=permit_sasl_authenticated,reject_unauth_destination
>   -o smtpd_tls_security_level=encrypt
root@badcompany /etc/postfix [2:12:20]
> # newaliases
root@badcompany /etc/postfix [2:12:27]
> # ll | grep aliases
-rw-r--r-- 1 root root 11K Dec 6 06:30 aliases
-rw-r--r-- 1 root root 20K Dec 17 02:12 aliases.lmdbaliasesをマップ化しておきます。これはnewaliasesコマンドだけで適切なフォーマットになるはずです。
3.2 LMTP周りの設定
main.cf を変更し、バーチャルドメインの設定を入れ込みます。
root@badcompany /etc/postfix                                                                                                                               [1:06:10]
> # vim /etc/postfix/virtual_mailbox_domains
root@badcompany /etc/postfix                                                                                                                               [1:06:15]
> # cat /etc/postfix/virtual_mailbox_domains
domain.tld OK
root@badcompany /etc/postfix                                                                                                                               [1:06:18]
> # postmap lmdb:/etc/postfix/virtual_mailbox_domains root@badcompany /etc/postfix [1:06:40]以上は、virtual_mailbox_domainsというmydestinationとは異なりバーチャルドメインを列挙する設定項目にテーブルを指定しています。
OKは、なんかそう入れるのがデフォらしいです。
root@badcompany /etc/postfix                                                       [4:43:39]
> # vim main.cf
root@badcompany /etc/postfix                                                       [4:46:40]
> # diff main.cf.20241208 main.cf
99a100
> myhostname = mail.domain.tld
106c107
< #mydomain = domain.tld
---
> mydomain = domain.tld
121c122
< #myorigin = $myhostname
---
> myorigin = $myhostname
183c184
< #mydestination = $myhostname, localhost.$mydomain, localhost
---
> mydestination = $myhostname, localhost.$mydomain, localhost
384a386,387
> virtual_mailbox_domains = lmdb:/etc/postfix/virtual_mailbox_domains
>
391a395
> virtual_transport = lmtp:unix:private/dovecot-lmtp
580c584,591
< #smtpd_banner = $myhostname ESMTP $mail_name ($mail_version)
---
> smtpd_banner = $myhostname ESMTP $mail_name ($mail_version)virtual_transportを利用するようになっています。
この場合DovecotのLMTPに転送されるメールの条件はvirtual_mailbox_domainsなどで定義する必要があります。
postfix連携でのLMTP部分に沿った設定内容になっています。
3.3 Dovecot SASL周りの設定
SASL周りの設定を入れます。
root@badcompany /etc/postfix                                                       [4:49:57]
> # vim main.cf
root@badcompany /etc/postfix                                                                      [4:57:21]
> # diff main.cf.20241208 main.cf
99a100
> myhostname = mail.domain.tld
106c107
< #mydomain = domain.tld
---
> mydomain = domain.tld
121c122
< #myorigin = $myhostname
---
> myorigin = $myhostname
183c184
< #mydestination = $myhostname, localhost.$mydomain, localhost
---
> mydestination = $myhostname, localhost.$mydomain, localhost
384a386,387
> virtual_mailbox_domains = lmdb:/etc/postfix/virtual_mailbox_domains
>
391a395
> virtual_transport = lmtp:unix:private/dovecot-lmtp
580c584,591
< #smtpd_banner = $myhostname ESMTP $mail_name ($mail_version)
---
> smtpd_banner = $myhostname ESMTP $mail_name ($mail_version)
>
> smtpd_sasl_auth_enable = yes
> smtpd_sasl_type = dovecot
> smtpd_sasl_path = private/auth
> smtpd_tls_auth_only = yes
3.4 SendGrid周り設定
SendGridをリレーとして使用する設定を入れ込みます。
root@badcompany /etc/postfix                                                                      [5:04:58]
> # vim main.cf
root@badcompany /etc/postfix                                                                      [5:05:30]
> # diff main.cf.20241208 main.cf
99a100
> myhostname = mail.domain.tld
106c107
< #mydomain = domain.tld
---
> mydomain = domain.tld
121c122
< #myorigin = $myhostname
---
> myorigin = $myhostname
183c184
< #mydestination = $myhostname, localhost.$mydomain, localhost
---
> mydestination = $myhostname, localhost.$mydomain, localhost
384a386,387
> virtual_mailbox_domains = lmdb:/etc/postfix/virtual_mailbox_domains
>
391a395
> virtual_transport = lmtp:unix:private/dovecot-lmtp
580c584,591
< #smtpd_banner = $myhostname ESMTP $mail_name ($mail_version)
---
> smtpd_banner = $myhostname ESMTP $mail_name ($mail_version)
>
> smtpd_sasl_auth_enable = yes
> smtpd_sasl_type = dovecot
> smtpd_sasl_path = private/auth
> smtpd_tls_auth_only = yes
689a697,705
>
> # SendGrid mail relay setting
> relayhost = [smtp.sendgrid.net]:587
> smtp_sasl_auth_enable = yes
> smtp_sasl_password_maps = lmdb:/etc/postfix/sasl_passwd
> smtp_sasl_security_options = noanonymous
> smtp_tls_security_level = encrypt
> smtp_tls_loglevel = 1
>ここで、/etc/postfix/sasl_passwd についてですが、こちらはSendGridの設定をしたら手に入る認証情報が必要になります。
4. SendGrid設定 が完了したらそれで手に入る認証情報をセットアップします。
3.5 証明書の設定
dovecotと同様に証明書の設定を行います。
root@badcompany /etc/postfix                                 [1:29:07]
> # diff main.cf.20241208 main.cf
99a100
> myhostname = mail.domain.tld
106c107
< #mydomain = domain.tld
---
> mydomain = domain.tld
121c122
< #myorigin = $myhostname
---
> myorigin = $myhostname
183c184
< #mydestination = $myhostname, localhost.$mydomain, localhost
---
> mydestination = $myhostname, localhost.$mydomain, localhost
384a386,387
> virtual_mailbox_domains = lmdb:/etc/postfix/virtual_mailbox_domains
>
391a395
> virtual_transport = lmtp:unix:private/dovecot-lmtp
580c584,591
< #smtpd_banner = $myhostname ESMTP $mail_name ($mail_version)
---
> smtpd_banner = $myhostname ESMTP $mail_name ($mail_version)
>
> smtpd_sasl_auth_enable = yes
> smtpd_sasl_type = dovecot
> smtpd_sasl_path = private/auth
> smtpd_tls_auth_only = yes
> smtpd_tls_cert_file = /opt/dehydrated/certs/domain.tld/fullchain.pem
> smtpd_tls_key_file = /opt/dehydrated/certs/domain.tld/privkey.pem
689a699,707
>
> # SendGrid mail relay setting
> relayhost = [smtp.sendgrid.net]:587
> smtp_sasl_auth_enable = yes
> smtp_sasl_password_maps = lmdb:/etc/postfix/sasl_passwd
> smtp_sasl_security_options = noanonymous
> smtp_tls_security_level = encrypt
> smtp_tls_loglevel = 1
>
4. SendGrid 設定
SendGridのアカウント発行後以下のような警告が出ると思います。
Domain AuthenticationまたはSingle Sender Verificationが設定されていない場合、2024年4月1日以降はメール送信ができなくなります。
最初は何を言っているのかよくわかりませんでしたが、簡単にいうとSendGridのインフラを使ってスパムを飛ばせないようにメールの送信者認証が厳格になったよ、ということらしいです。
逆に、今まではMailFromをSendGridのドメインにしてスパムを飛ばせまくれたんですかね。だとするとヤバすぎますが笑
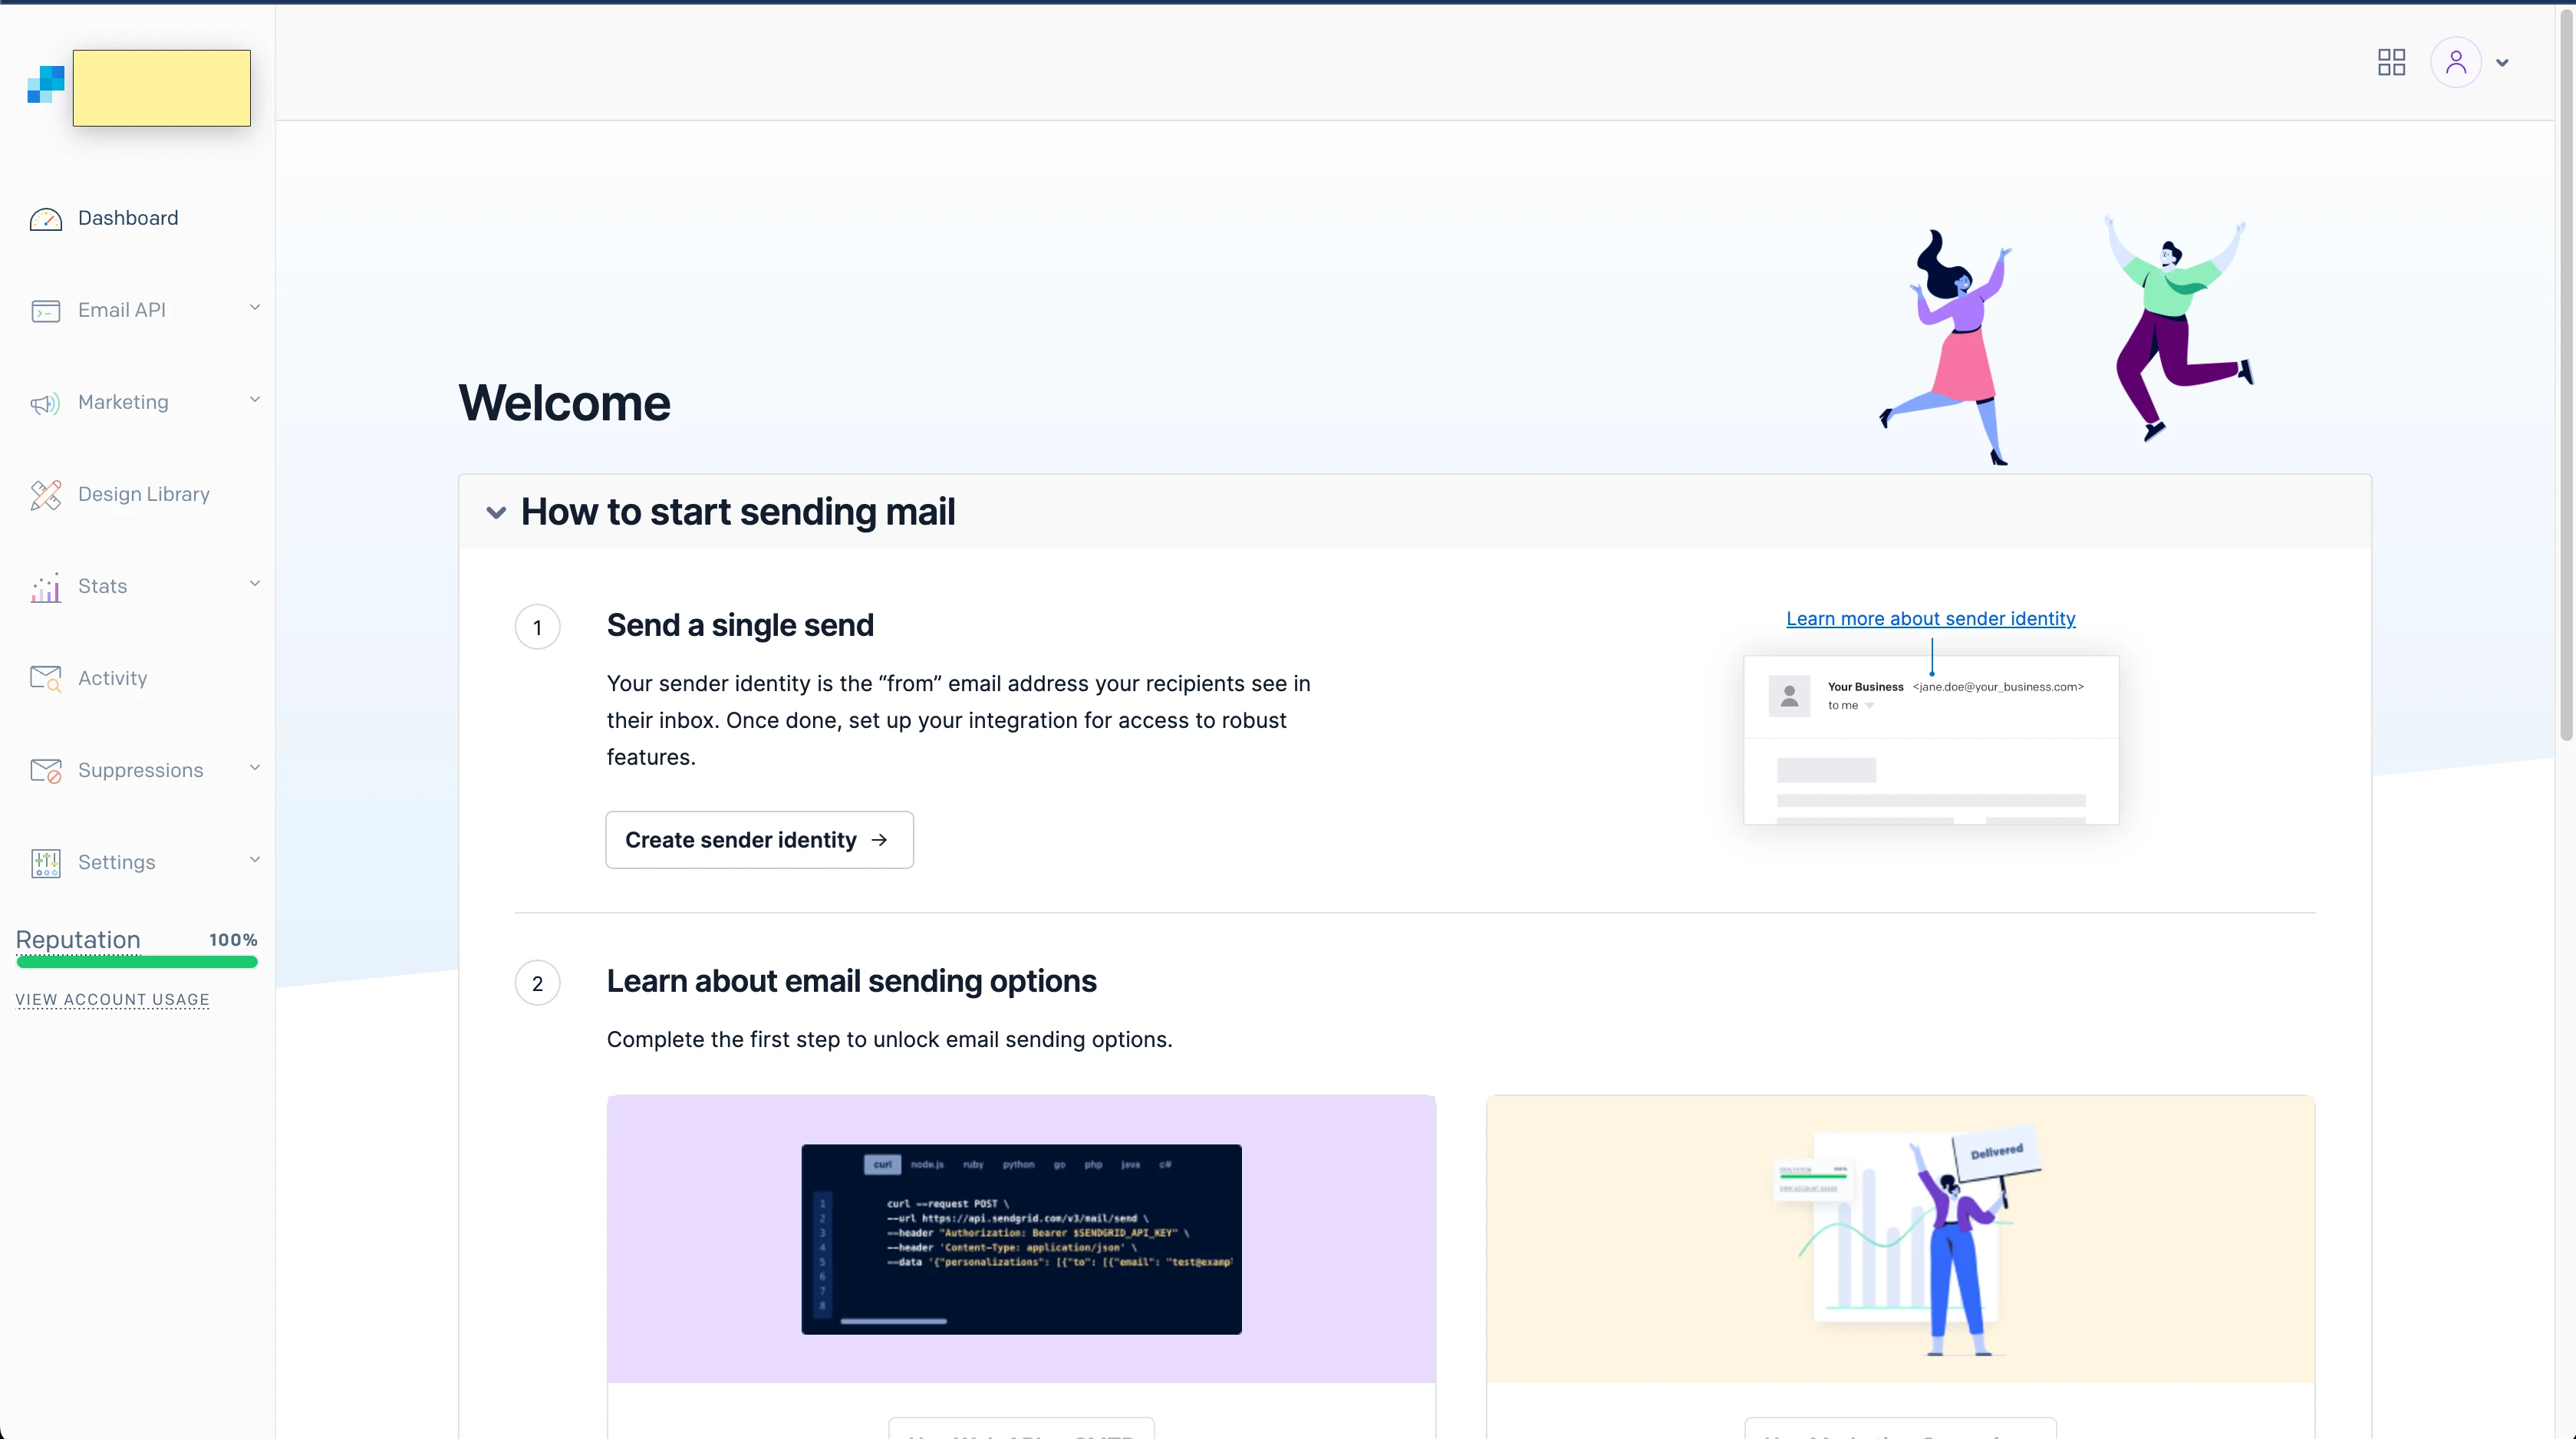
4.1 アカウント登録
SendGridの公式からGoogleアカウントで登録しました。
日本の構造計画研究所の方ではなく、公式の方からです。

4.2 送信ドメイン認証
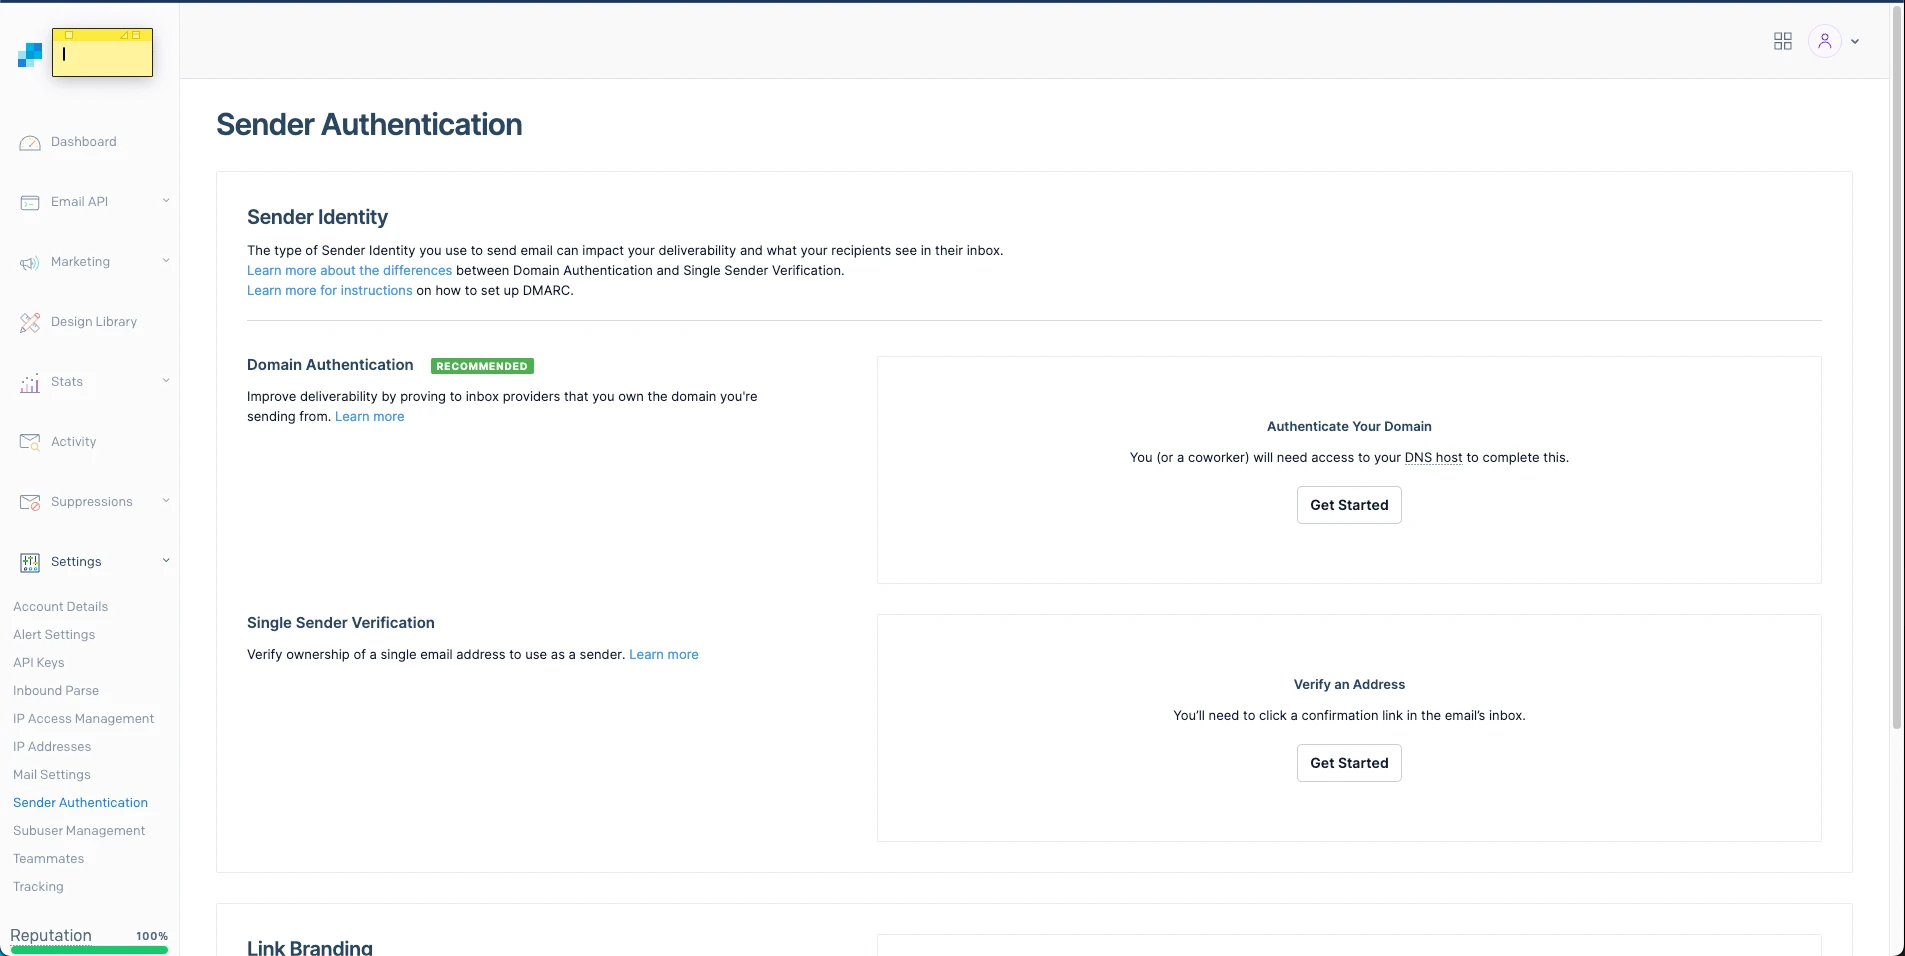
Setting > Sender Authentication > Domain Authentication
と進みます。
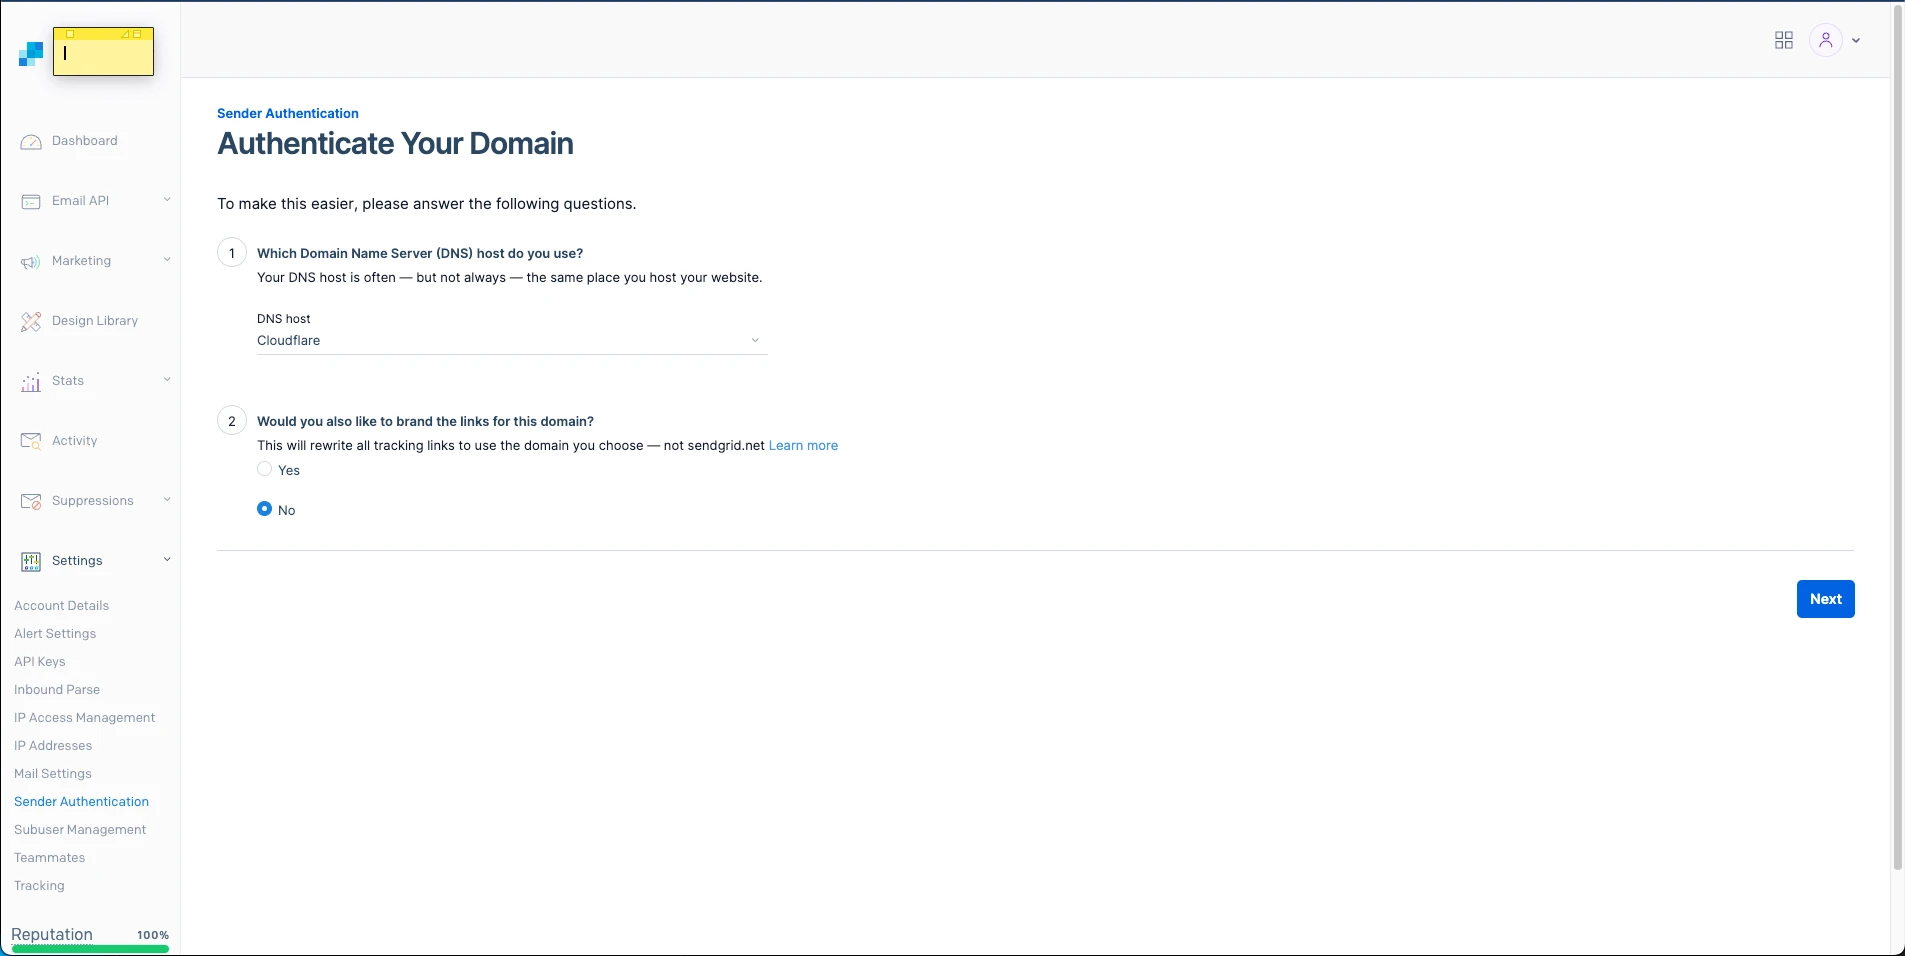
Fromヘッダーのドメインを入力して進みます。これは、エンベロープFromではなく、Fromヘッダーのドメイン部分です。
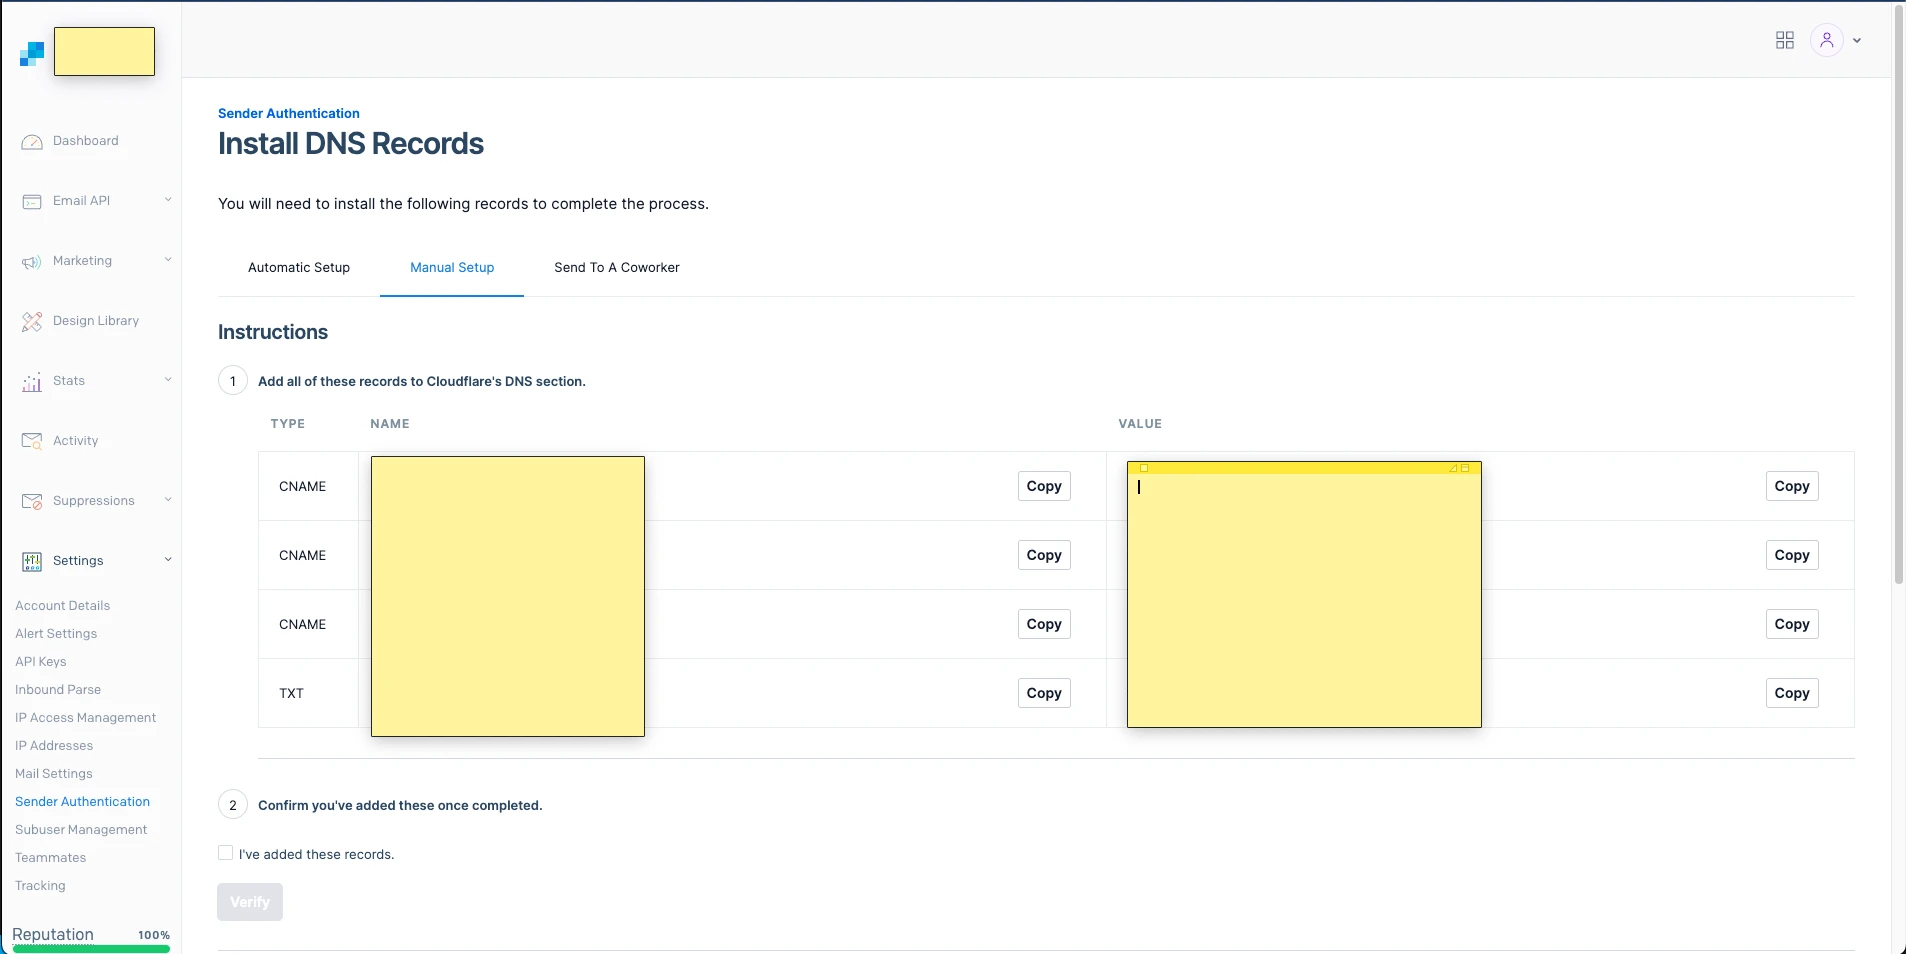
レジストラを選択する画面でCloudflareの選択肢があったので、自動でやってくれるのかと思ったのですが、手動なようです。 言われるがままレコードをセットアップします。

CloudflareのDNSの速度はマジで世界最強ですな。
Route53が遅くて面倒な目に遭ったことがあるので、Route53に比べて最強に思えます。
4.3 APIキーの作成
送信時のSMTP-AUTHのパスワードがAPI Keyとなっています。
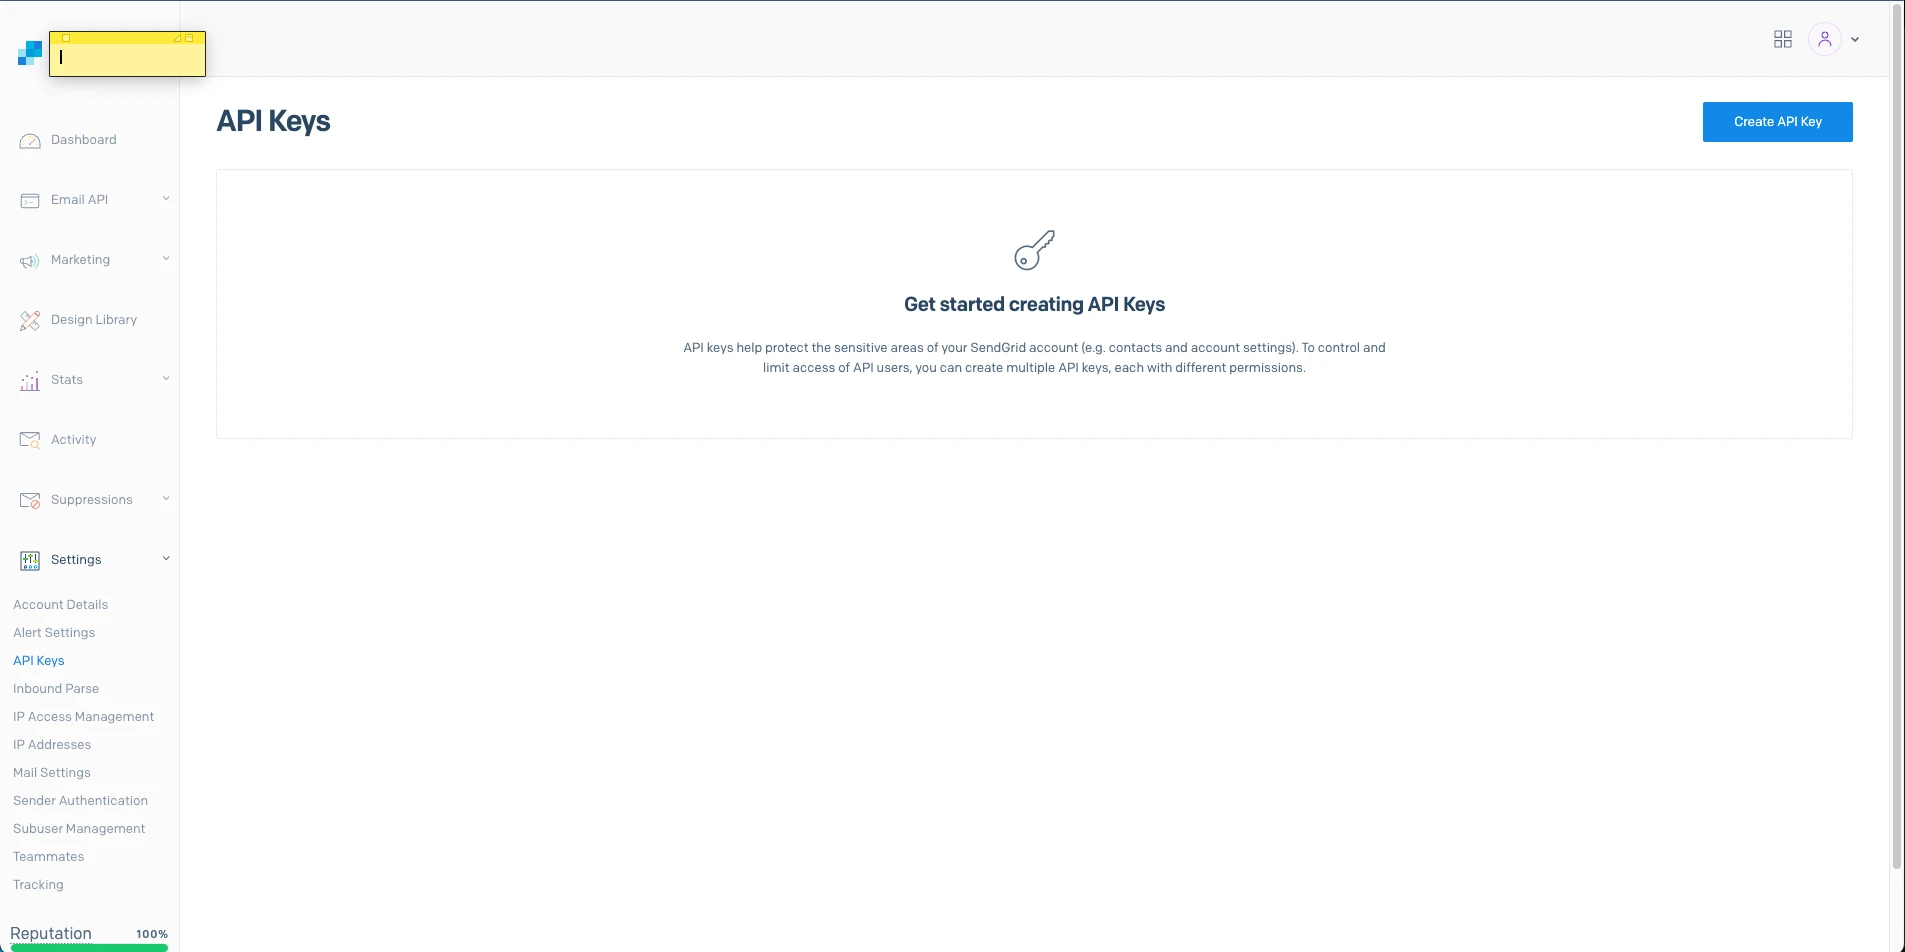
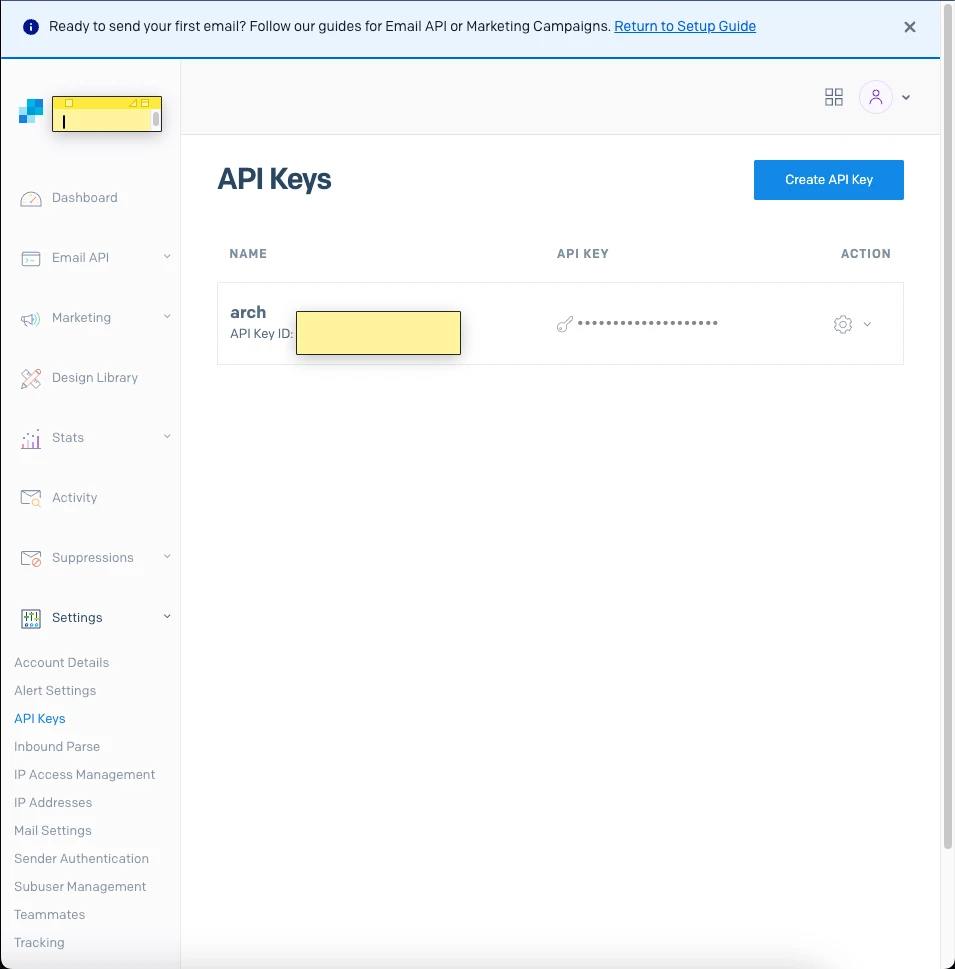
作成して保存しておきましょう。
4.5 postfixに認証情報を渡す
postfixがリレーとしてSendGridを利用できるように、SendGridの認証情報をpostfixに渡す必要があります。
3.4 にてリレーの設定と、その認証情報のパスは設定済みです。こちらに実際の情報を書いていきます。
root@badcompany /etc/postfix                                 [0:44:57]
> # vim sasl_passwd
root@badcompany /etc/postfix                                 [0:45:10]
> # cat sasl_passwd
[smtp.sendgrid.net]:587 apikey:yourSendGridApiKey
root@badcompany /etc/postfix                                 [0:45:12]
> # ll sasl_passwd
-rw-r--r-- 1 root root 50 Dec 15 00:45 sasl_passwd
root@badcompany /etc/postfix                                 [0:45:21]
> # chmod 600 sasl_passwd
root@badcompany /etc/postfix                                 [0:45:28]
> # ll sasl_passwd
-rw------- 1 root root 50 Dec 15 00:45 sasl_passwd
root@badcompany /etc/postfix                                 [0:45:32]
> # postmap lmdb:/etc/postfix/sasl_passwd
root@badcompany /etc/postfix                                 [0:45:46]
> # ll | grep sasl
-rw------- 1 root root   50 Dec 15 00:45 sasl_passwd
-rw------- 1 root root  12K Dec 15 00:45 sasl_passwd.lmdb
これでOKです。
当然ですが、yourSendGridApiKeyは先ほど作成したAPIキーに差し替えてください。
5. ドメイン 設定
受信のためのドメイン設定を行います。
root@badcompany /etc/postfix                                 [0:47:47]
> # dig domain.tld mx +short
10 mail.domain.tld.
6. 検証
サーバー起動前に設定に異常がないかチェックします。
root@badcompany /etc/postfix                                 [1:11:16]
> # postfix check
root@badcompany /etc/postfix                                 [1:11:21]
> # doveconf -n
設定値が一覧表示される
必要に応じてポート解放します。 自分は自宅サーバーなのでONUでポート解放の設定を入れます。 解放する必要のあるポートは25,587,993のみです。
root@badcompany /etc/postfix                                 [1:28:43]
> # systemctl start postfix
root@badcompany /etc/postfix                                 [1:28:47]
> # systemctl status dovecot
● dovecot.service - Dovecot IMAP/POP3 email server
     Loaded: loaded (/usr/lib/systemd/system/dovecot.service; disabled>
     Active: active (running) since Sun 2024-12-15 01:28:43 JST; 8s ago
 Invocation: dce1eda83fb0448ca2c56af06cad1f78
       Docs: man:dovecot(1)
             https://doc.dovecot.org/
   Main PID: 702362 (dovecot)
     Status: "v2.3.21.1 (d492236fa0) running"
      Tasks: 4 (limit: 57486)
     Memory: 3.7M (peak: 4.5M)
        CPU: 35ms
     CGroup: /system.slice/dovecot.service
             ├─702362 /usr/bin/dovecot -F
             ├─702366 dovecot/anvil
             ├─702367 dovecot/log
             └─702368 dovecot/config

Dec 15 01:28:43 domain.tld systemd[1]: Starting Dovecot IMAP/POP>
Dec 15 01:28:43 domain.tld dovecot[702362]: master: Dovecot v2.3>
Dec 15 01:28:43 domain.tld systemd[1]: Started Dovecot IMAP/POP3>
root@badcompany /etc/postfix                                 [1:28:57]
> # systemctl start postfix
root@badcompany /etc/postfix                                 [1:29:01]
> # systemctl status postfix
● postfix.service - Postfix Mail Transport Agent
     Loaded: loaded (/usr/lib/systemd/system/postfix.service; disabled>
     Active: active (running) since Sun 2024-12-15 01:28:47 JST; 17s a>
 Invocation: a702fdacd6274e7d819601fe0776b3ee
    Process: 702396 ExecStart=/usr/bin/postfix start (code=exited, sta>
   Main PID: 702463 (master)
      Tasks: 3 (limit: 57486)
     Memory: 2.8M (peak: 4.5M)
        CPU: 335ms
     CGroup: /system.slice/postfix.service
             ├─702463 /usr/lib/postfix/bin/master -w
             ├─702464 pickup -l -t unix -u
             └─702465 qmgr -l -t unix -u

Dec 15 01:28:47 domain.tld systemd[1]: Starting Postfix Mail Tra>
Dec 15 01:28:47 domain.tld postfix[702461]: postfix/postlog: sta>
Dec 15 01:28:47 domain.tld postfix/postfix-script[702461]: start>
Dec 15 01:28:47 domain.tld postfix/master[702463]: daemon starte>
Dec 15 01:28:47 domain.tld systemd[1]: Started Postfix Mail Tran>
デーモンをスタートさせます
Thunderbirdで作成したユーザーにログインします
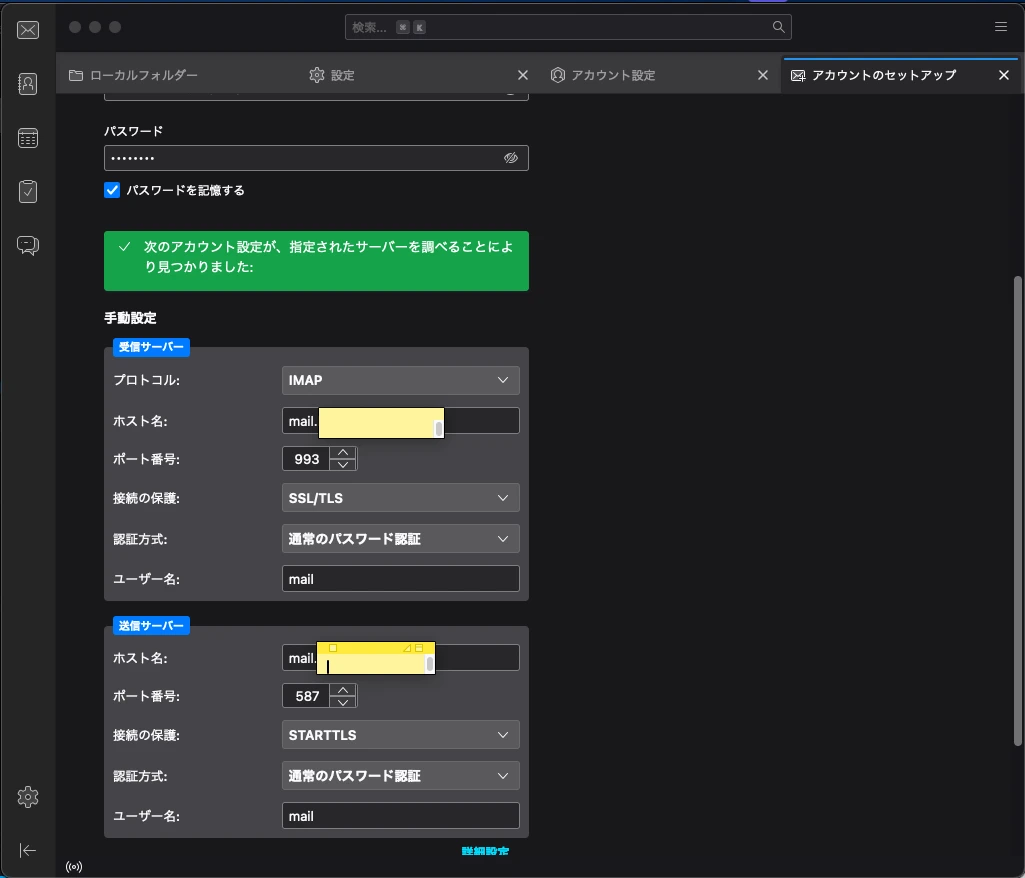
なんかユーザー名がmailのままで認証成功したり、25のSTARTTLSが表示されたり色々Thunderbirdの挙動が謎でしたが、IMAPは993しか開けていないためSSL/TLS接続のみでした。
Thunderbirdからメールを送信してみます。LMTPユーザーを使ったSASL認証に成功している段階でSendGrid周りがイカれてない限り送信できるはずです。
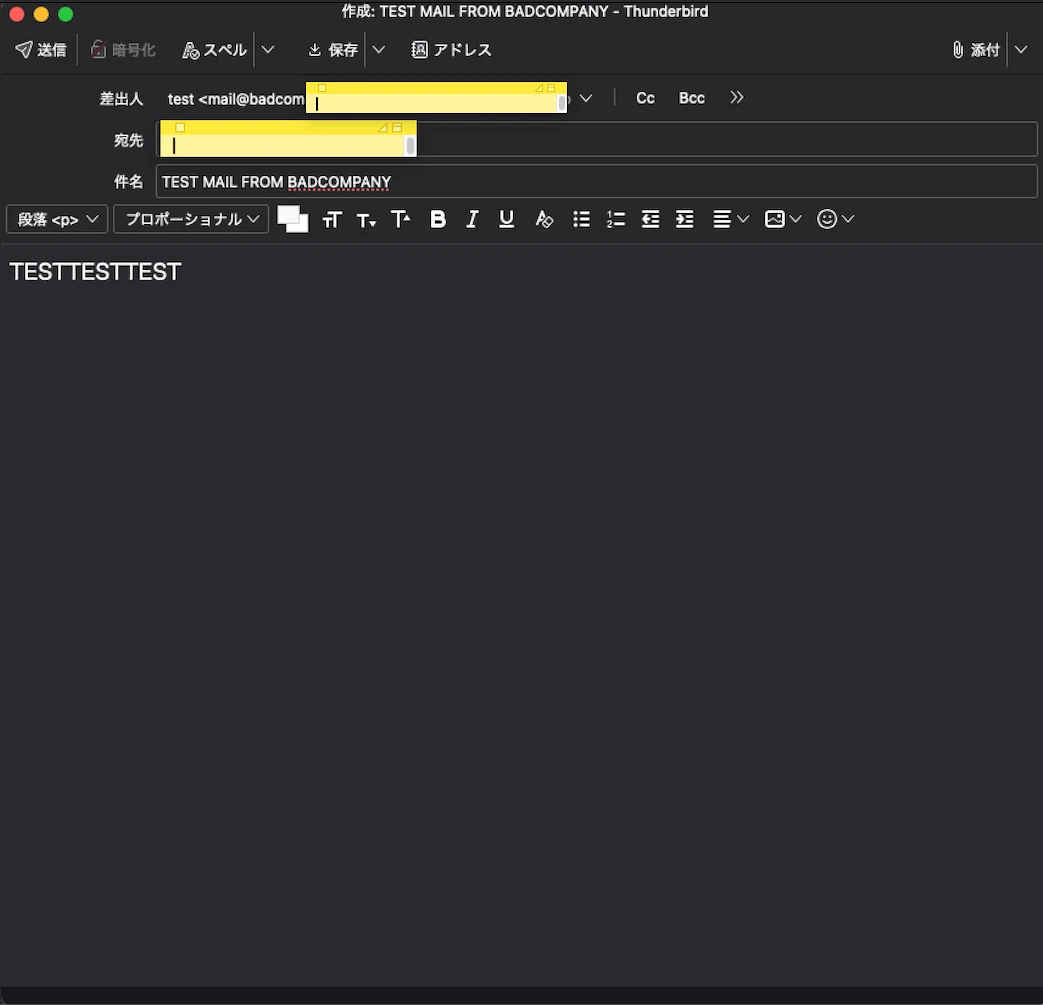
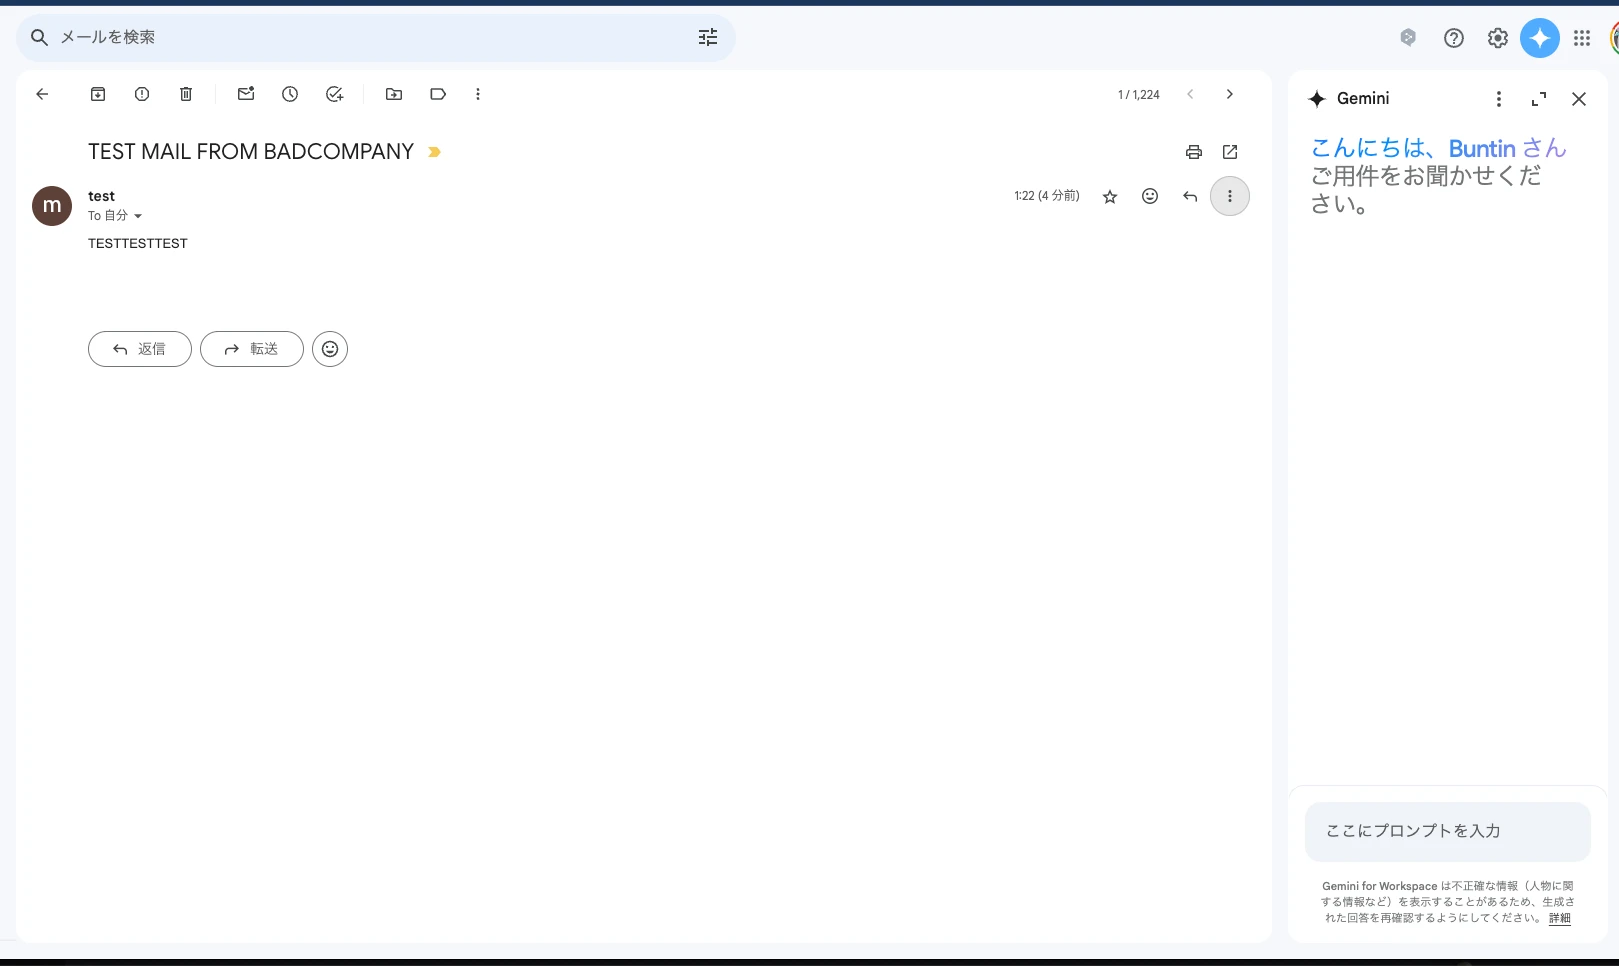
gmailで受信が確認できたら、gmailからメールを送信し受信を検証します。
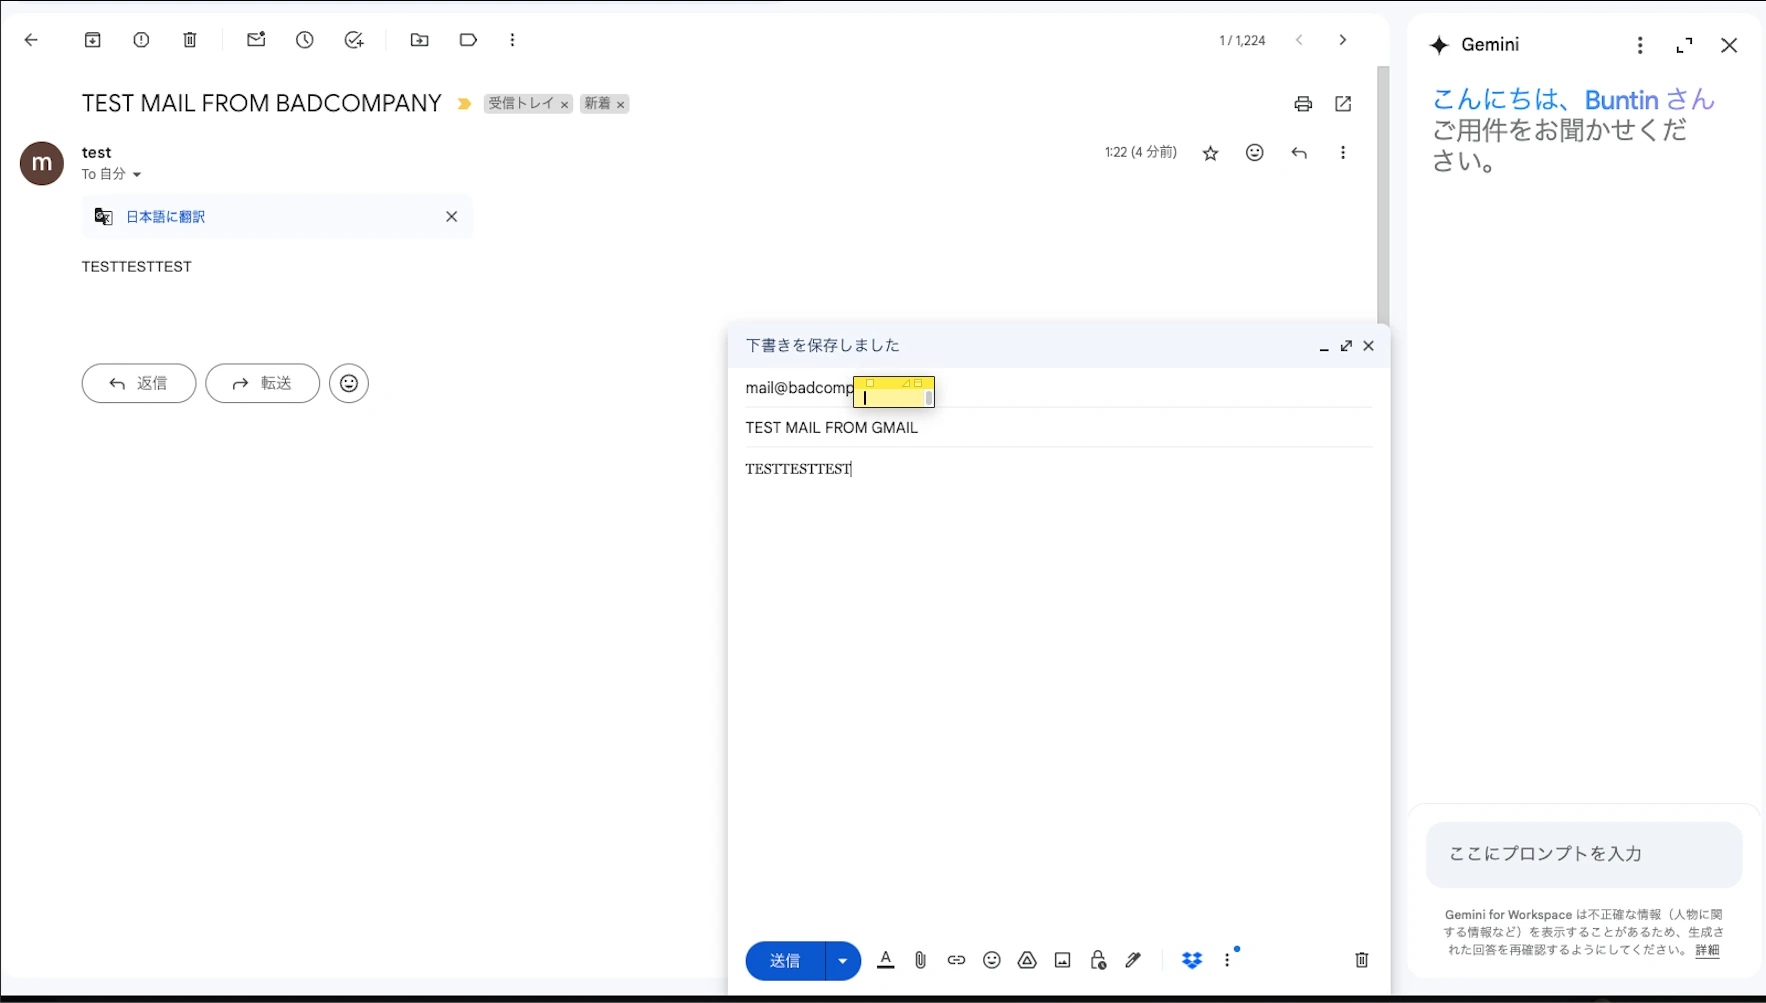
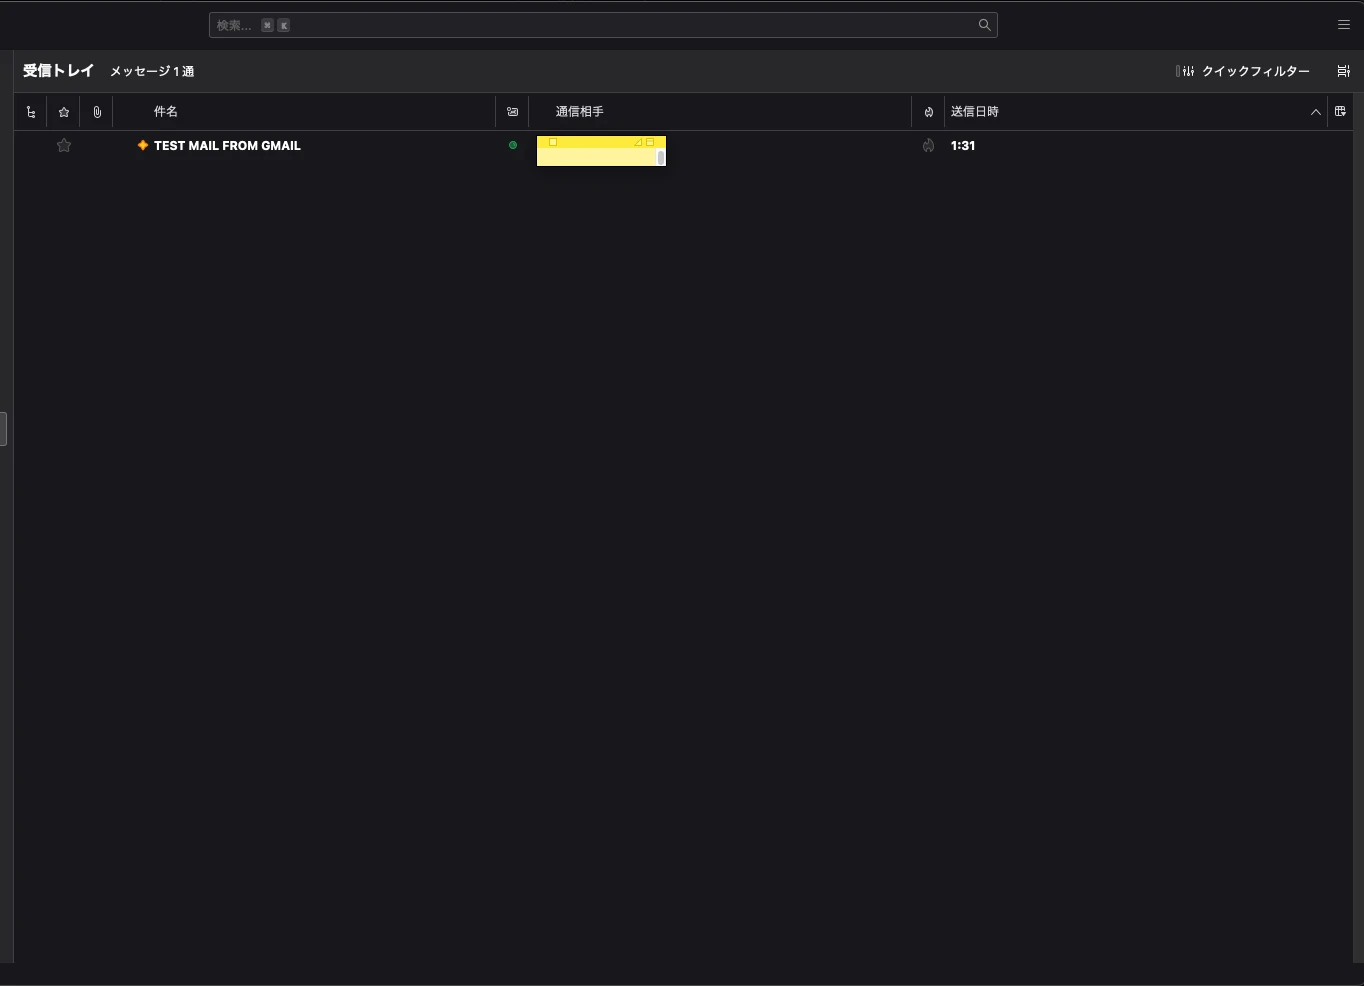
完璧ですね。
システムユーザーの配送が隔離されているか念のため確認しておきます。
buntin in 🌐 badcompany in xlog on main [!] via v23.4.0
❯ echo "test mail to root from buntin" | mail -s "testmail" root
buntin in 🌐 badcompany in xlog on main [!] via v23.4.0
❯ sudo -i
root@badcompany ~ [9:10:52]
> # tail /var/log/mail.log
Dec 19 09:04:50 domain.tld postfix/anvil[1152764]: statistics: max cache size 1 at Dec 19 09:01:29
Dec 19 09:10:33 domain.tld postfix/postfix-script[1155436]: stopping the Postfix mail system
Dec 19 09:10:33 domain.tld postfix/master[1069418]: terminating on signal 15
Dec 19 09:10:33 domain.tld postfix/postfix-script[1155508]: starting the Postfix mail system
Dec 19 09:10:33 domain.tld postfix/master[1155510]: daemon started -- version 3.9.1, configuration /etc/postfix
Dec 19 09:10:48 domain.tld postfix/pickup[1155511]: 5A32516C6677: uid=1001 from=<buntin>
Dec 19 09:10:48 domain.tld postfix/cleanup[1155660]: 5A32516C6677: message-id=<[email protected]>
Dec 19 09:10:48 domain.tld postfix/qmgr[1155512]: 5A32516C6677: from=<[email protected]>, size=372, nrcpt=1 (queue active)
Dec 19 09:10:48 domain.tld postfix/local[1155663]: 5A32516C6677: to=<[email protected]>, orig_to=<root>, relay=local, delay=0.03, delays=0.02/0.01/0/0, dsn=2.0.0, status=sent (delivered to maildir)
Dec 19 09:10:48 domain.tld postfix/qmgr[1155512]: 5A32516C6677: removed
root@badcompany ~ [9:11:07]
> # mailx -f mail
mail version v14.9.24. Type `?' for help
/root/mail: 1 message 1 new
▸N 1 [email protected] 2024-12-19 09:10 14/468 testmail
?
[-- Message 1 -- 14 lines, 468 bytes --]:
Date: Thu, 19 Dec 2024 09:10:48 +0900
To: [email protected]
Subject: testmail
Message-Id: <[email protected]>
From: [email protected]
test mail to root from buntin
? exitroot@badcompany ~ [9:11:18]
> # echo "test mail to buntin from root" | mail -s "testmail" buntin
root@badcompany ~ [9:12:59]
> # tail /var/log/mail.log
Dec 19 09:10:48 domain.tld postfix/pickup[1155511]: 5A32516C6677: uid=1001 from=<buntin>
Dec 19 09:10:48 domain.tld postfix/cleanup[1155660]: 5A32516C6677: message-id=<[email protected]>
Dec 19 09:10:48 domain.tld postfix/qmgr[1155512]: 5A32516C6677: from=<[email protected]>, size=372, nrcpt=1 (queue active)
Dec 19 09:10:48 domain.tld postfix/local[1155663]: 5A32516C6677: to=<[email protected]>, orig_to=<root>, relay=local, delay=0.03, delays=0.02/0.01/0/0, dsn=2.0.0, status=sent (delivered to maildir)
Dec 19 09:10:48 domain.tld postfix/qmgr[1155512]: 5A32516C6677: removed
Dec 19 09:12:59 domain.tld postfix/pickup[1155511]: 4D6E516C6677: uid=0 from=<root>
Dec 19 09:12:59 domain.tld postfix/cleanup[1156918]: 4D6E516C6677: message-id=<[email protected]>
Dec 19 09:12:59 domain.tld postfix/qmgr[1155512]: 4D6E516C6677: from=<[email protected]>, size=369, nrcpt=1 (queue active)
Dec 19 09:12:59 domain.tld postfix/local[1156923]: 4D6E516C6677: to=<[email protected]>, orig_to=<buntin>, relay=local, delay=0.02, delays=0.01/0/0/0, dsn=2.0.0, status=sent (delivered to maildir)
Dec 19 09:12:59 domain.tld postfix/qmgr[1155512]: 4D6E516C6677: removed
root@badcompany ~ [9:13:06]
> # exit
buntin in 🌐 badcompany in ~ via 🐍 v3.12.7
❯ ls
buntin.p12 gits liz liz.p12 mail Untitled.ipynb
buntin in 🌐 badcompany in ~ via 🐍 v3.12.7
❯ mailx -f mail
mail version v14.9.24. Type `?' for help
/home/buntin/mail: 1 message 1 new
▸N 1 [email protected] 2024-12-19 09:12 14/467 testmail
?
[-- Message 1 -- 14 lines, 467 bytes --]:
Date: Thu, 19 Dec 2024 09:12:59 +0900
To: [email protected]
Subject: testmail
Message-Id: <[email protected]>
From: [email protected]
test mail to buntin from root
? q
/home/buntin/mail updated.
いい感じですね。
基本的な構造を組むところまでは終わりました。 あとは、同一ユーザー名でバーチャルドメイン(バーチャルエイリアスドメイン)を使用できることが確認できたら、アカウントを量産する準備を始められますね。
フェーズ2
同一メールボックスの複数ユーザーを定義できることを確認します。
基本的な設定は終わっているので、変更する場所は基本的にlmdbになってる奴らです。
どのような形式でデータを定義することにするのか、という点で結構悩みました。 最終的にバックアップもなくなったら作成者、エンジニアが手書きできなくてはならない、というのが私のLinuxをハックする上でのモットーです。 しかし、流石に個数が多い分lmdbに変換するプロセスも忘れないようにしなくてはなりません。 変換忘れみたいなことがだるいので、最初から最後までプログラムにすることで追加忘れや実行忘れを防ぎます。
定義ファイル
tomlで定義します。
[[mailbox]]
name = "buntin.com"
users = [
  { email = "[email protected]", password = "PASSWORD" },
]

[[mailbox]]
name = "domain.tld"
users = [
  { email = "[email protected]", password = "PASSWORD" },
  { email = "[email protected]", password = "PASSWORD" },
  { email = "[email protected]", password = "PASSWORD" },
]

[[mailbox]]
name = "postmaster"
users = [
  { email = "[email protected]", password = "PASSWORD" },
  { email = "[email protected]", password = "PASSWORD" },
]
以上はサンプルです。ガチの設定はこれ以上に記述してあります。
Denoスクリプト
定義したユーザーデータは、以下のDenoスクリプトで自動的にpostfix達に認識させます
#!/usr/bin/env -S deno run -A

import $ from "jsr:@david/dax";
import { parse } from "jsr:@std/toml";

const MailUserConfigPath = "/var/vmail/users.toml";
// const MailUserConfigPath = "users.toml";

const virtualMailboxDomainsPath = "/etc/postfix/virtual_mailbox_domains";
// const virtualMailboxDomainsPath = "virtual_mailbox_domains";

const dovecotUsersPath = "/etc/dovecot/users";
// const dovecotUsersPath = "users";

type MailUserConfig = {
  mailbox: {
    name: string;
    users: {
      email: string;
      password: string;
    }[];
  }[];
};

const userConfig = parse(
  Deno.readTextFileSync(MailUserConfigPath),
) as MailUserConfig;

const generateVirtualMailboxDomains = (config: MailUserConfig) =>
  Array.from(
    new Set(
      config.mailbox.flatMap((mb) =>
        mb.users.map((user) => splitEmail(user.email)[1])
      ),
    ),
  )
    .map((domain) => `${domain} OK`)
    .join("\n");

const splitEmail = (email: string) => {
  const [username, domain] = email.split("@");
  if (!username || !domain) {
    throw new Error(
      `不正なメールアドレス形式(${email})
      }`,
    );
  }
  return [username, domain];
};

const generateDovecotUserEntry = async (
  email: string,
  password: string,
  homeDir: string,
) => {
  const hashedResult = await $`doveadm pw -s CRYPT -p '${password}'`.text();
  const line = `${email}:${hashedResult}::::${homeDir}::`;
  return line;
};

const generateDovecotUsers = async (
  config: MailUserConfig,
) => {
  const lines: string[] = [];
  for (const mb of config.mailbox) {
    const homeDir = `/var/vmail/${splitEmail(mb.users[0].email)[1]}/${splitEmail(mb.users[0].email)[0]
      }`;
    for (const user of mb.users) {
      lines.push(
        await generateDovecotUserEntry(user.email, user.password, homeDir),
      );
    }
  }
  return lines.join("\n");
};

const generateMailboxHomeDirs = (config: MailUserConfig) =>
  config.mailbox.map((mb) => {
    const [username, domain] = splitEmail(mb.users[0].email);
    return `/var/vmail/${domain}/${username}`;
  });

const virtualDomains = generateVirtualMailboxDomains(userConfig);
Deno.writeFileSync(
  virtualMailboxDomainsPath,
  new TextEncoder().encode(virtualDomains),
);
await $`postmap ${virtualMailboxDomainsPath}`;

const dovecotUsers = await generateDovecotUsers(userConfig);
Deno.writeFileSync(dovecotUsersPath, new TextEncoder().encode(dovecotUsers));

for (const dir of generateMailboxHomeDirs(userConfig)) {
  await $`mkdir -p ${dir}`;
  await $`chown vmail: ${dir}`;
}

await $`systemctl restart dovecot`;
await $`systemctl restart postfix`;
BunShellを使わない縛りを最近自分に課しているので、仕方なくDenoのdaxで簡単なスクリプトを組みましたが
await $`postmap lmdb:path/to/file`
といったコードがキモくてちょっと気に入ってないです。そのうち書き直します。
バーチャルドメイン・バーチャルユーザー・同一メールボックスの検証
以上のように複数ユーザーを、複数のドメインで定義しました。
送信については、dovecotのsasl認証が成功した時点で、sendgridに登録があれば送信は必ずできます。したがって先ほどの検証で十分です。
問題は、複数のユーザー、ドメインで一つのメールボックスを共有する設定が有効に働くか、という点です。 こちらも、先ほどの単一メールアドレスで受信が成功した時点で、ユーザーの設定ファイルが適切に認識されれば問題なく動作するはずです。
しかし、わざわざDovecotのLMTPを使用している理由はそのユーザー情報の定義の仕方によってマルチユーザーの同一メールボックスも簡単に実現できるためなので、それは検証しておきたいです。 先ほどの定義ファイルのbadcompanyメールボックスが全てのユーザーで同じメールボックスで受信できるかどうかを確認します。
先ほどの例のtomlの一部に、マルチドメイン、マルチユーザーで共有しているメールボックスがあるので、それが機能するかどうかで確認します。
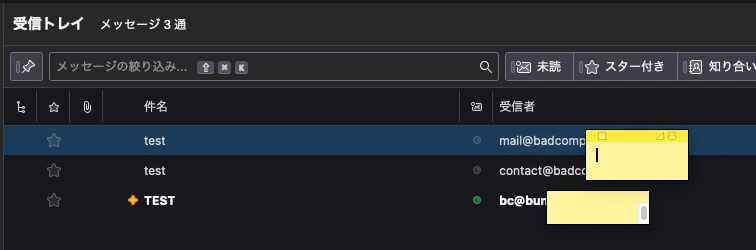 OKですね。
とりあえずDenoの例のスクリプト以外は満足できる構成になったのかなと思います。
OKですね。
とりあえずDenoの例のスクリプト以外は満足できる構成になったのかなと思います。
記事が長くなりすぎたので分けますが、SpamAssassin・fail2ban・ClamAVらへんを導入しようかなと考えています。最近セキュリティ的にあまりよろしくない事件があったので、そこらへんちょっとヒスってます。
とりあえず構成を完成させるところまでは終わったので、この辺でこの記事は締めます。では!
参考
メールサーバーのデプロイ > 1.6. LMTP ソケットと LMTPS リスナーの設定 | docs.redhat.com
virtual_users | doc.dovecot.org
